Planning your wedding can be both thrilling and overwhelming. Among the countless details to consider, preserving the special moments of your big day is often at the forefront of your mind. You want every smile, every tear, and every dance captured beautifully. That’s why I created this post— to help you craft stunning, personalized photo frames that will showcase your wedding memories in a truly unique way.
If you’re a bride or groom looking to add a personal touch to your wedding decor, this guide is for you. You might be searching for ways to express your love and style through DIY projects, or perhaps you want to create memorable gifts for your bridal party. Whatever your reason, you’ll find this collection of DIY photo frame ideas both inspiring and easy to execute.
In this post, you’ll discover eleven gorgeous wedding photo frames you can create yourself. Each frame is designed to highlight those special moments that mean the most to you. So, grab your crafting supplies and get ready to dive into a world of creativity that celebrates your love!
Key Takeaways
– Discover how to create personalized photo frames that showcase your wedding memories, enhancing your decor and making a statement.
– Each DIY project is easy to follow and allows for personal expression, perfect for couples looking to add a unique touch to their big day.
– From rustic wooden frames to floral embellished options, you’ll find styles that fit every wedding theme and personality.
– This guide offers practical tips and materials needed for each frame, making it simple for you to get started right away.
– Enjoy the satisfaction of crafting beautiful keepsakes that celebrate your love story and can be cherished for years to come.
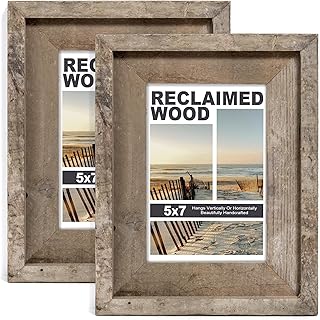
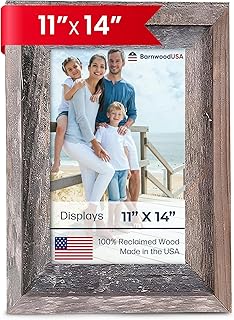
1. Rustic Wooden Frame
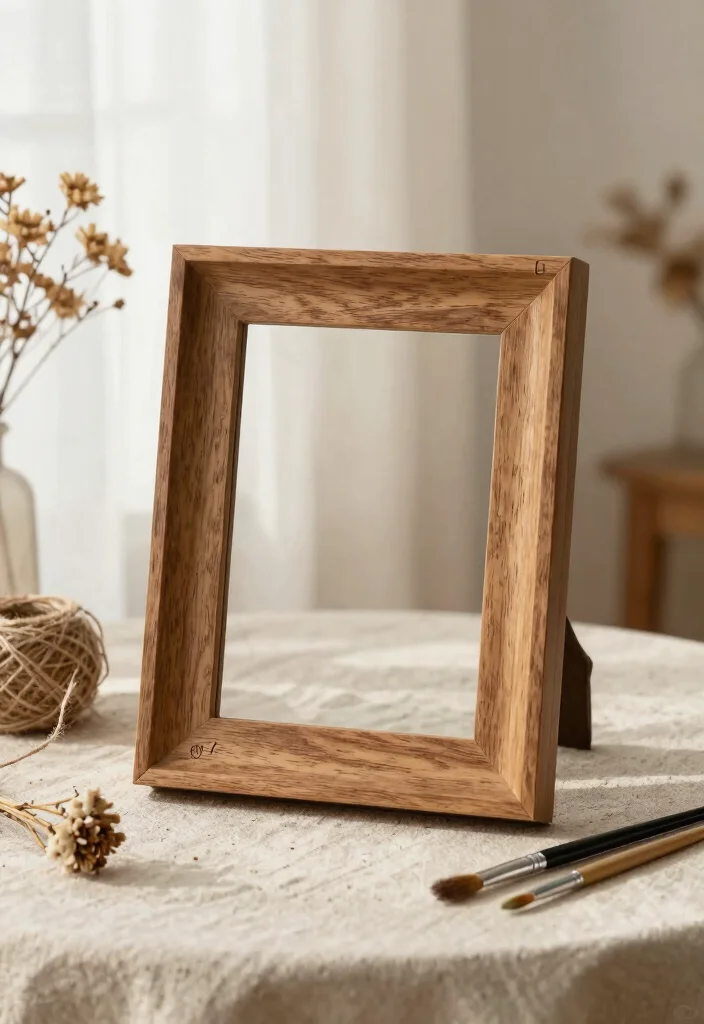
Embrace the beauty of nature with a rustic wooden frame for your wedding photos. This DIY project not only infuses charm into your decor but also connects perfectly with an outdoor celebration. The warm tones of reclaimed wood create a comforting atmosphere, making your memories feel even more cherished.
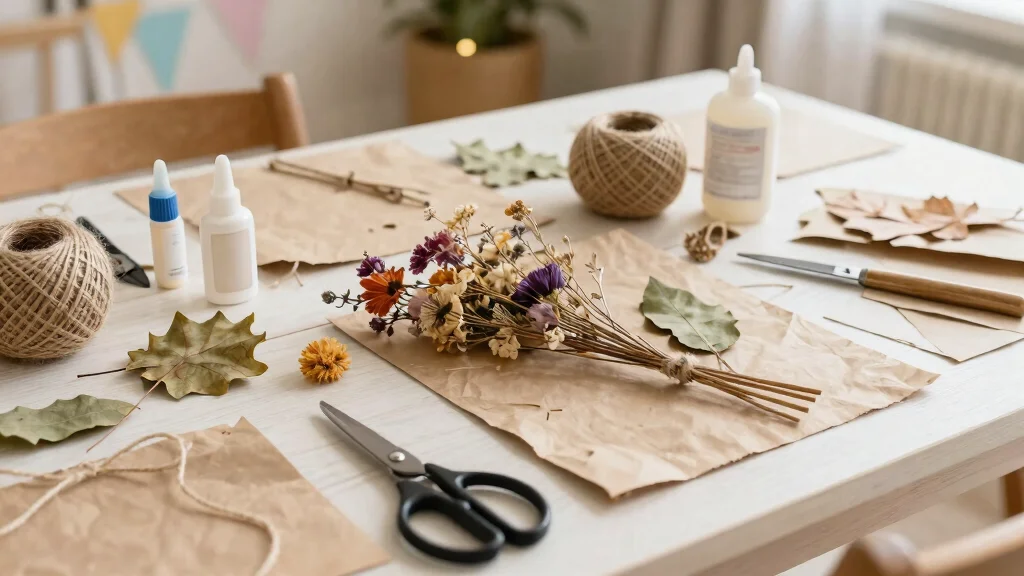
To bring your frame to life, start with a piece of reclaimed wood. Sand it down for a smooth finish and consider painting it in soft, earthy shades or keeping it raw to enhance its natural beauty. Once your wood is ready, cut it into your desired shape and secure the pieces with wood glue. Add personal touches with twine, dried flowers, or lace for a unique finish.
Materials Needed:
– Reclaimed wood
– Sandpaper
– Soft paint or wood stain
– Twine, dried flowers, or lace
– Craft glue
– Picture hanging hardware
Tips: Ensure you leave enough space for your picture and decorations. Experiment with different shapes and sizes to make it truly unique!
Rustic Wooden Frame
Editor’s Choice


2. Vintage Lace Frame
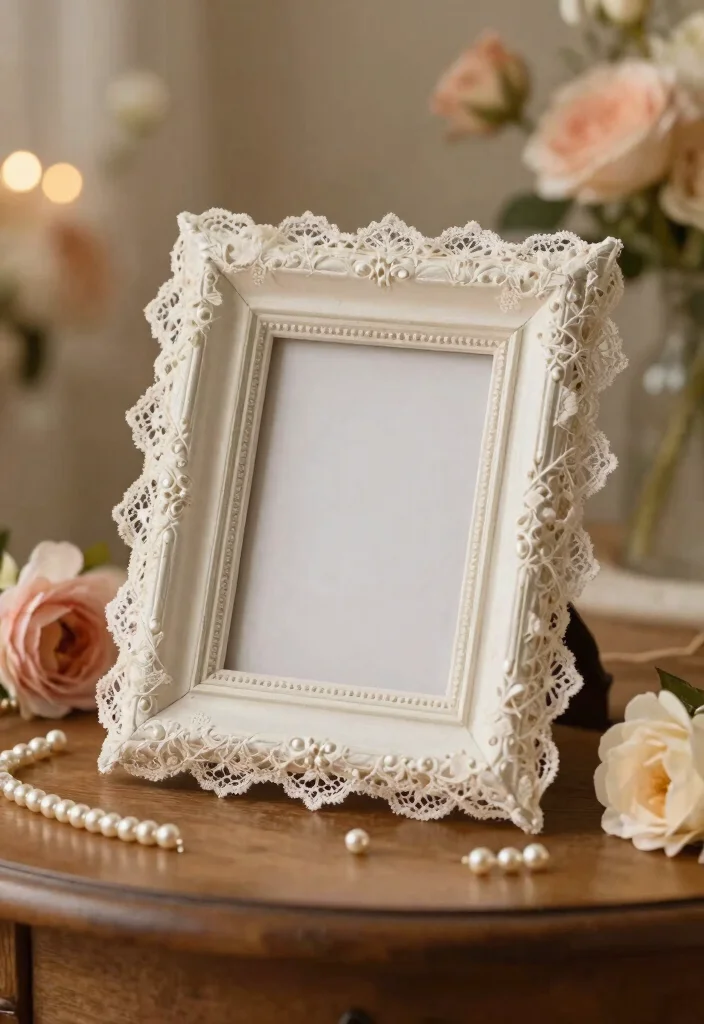
If you envision a vintage wedding, a lace photo frame is the perfect addition to your decor. This delicate frame captures the essence of romance and elegance, making your cherished memories stand out beautifully.
Start by selecting a plain wooden frame and painting it in soft pastel colors like blush pink or creamy white. Once dry, gently wrap lace around the frame, securing it with craft glue. Layer different types of lace for added texture, and finish the look with pearls or tiny gems for a sparkling touch.
Materials Needed:
– Wooden frame
– Soft acrylic paint
– Lace fabric
– Craft glue
– Pearls or decorative gems
Tips: Choose lace in varying widths to create visual interest. This frame will beautifully complement black-and-white photos of you and your partner!
Vintage Lace Frame
Editor’s Choice


3. Modern Geometric Frame
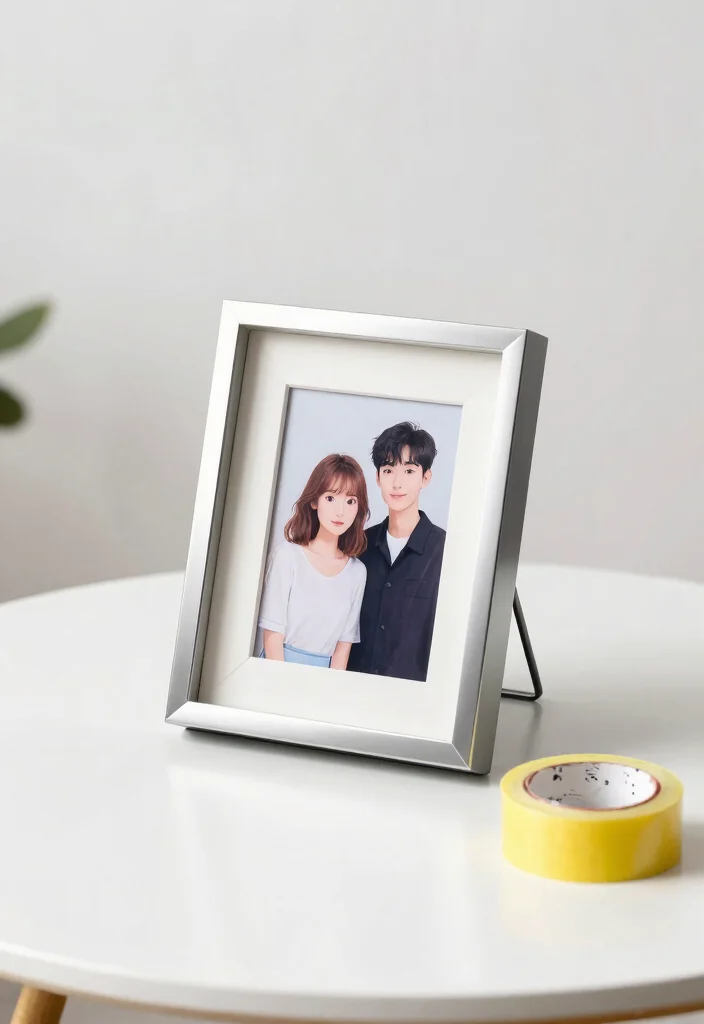
For couples who appreciate a contemporary flair, a geometric photo frame offers a stylish way to display your wedding moments. This chic design is perfect for those who want to make a bold statement with their decor.
Begin with a simple frame in a geometric shape, such as square or hexagonal. Use painter’s tape to create sections and paint them in bold colors like navy blue or metallic gold. Once everything is dry, you can add metallic accents or glitter for an extra pop of glam!
Materials Needed:
– Plain geometric frame
– Painter’s tape
– Bold acrylic paint
– Glitter or metallic paint
Tips: Don’t hesitate to mix and match colors! This frame can become a striking conversational piece at your wedding.
How To Choose the Right Personalized Photo Frame for Your Wedding
When planning your wedding, you want everything to be perfect, including the photo frames that will hold your cherished memories. Choosing the right personalized photo frames can be quite the task with so many options available. Here’s a handy guide to help you make the best choice.
1. Determine the Size
Start by deciding the size of the photo frames. Do you want standard sizes like 4×6 or 5×7, or something larger like an 8×10? Consider where you’ll display these frames. For a mantel or table, smaller frames may work better. If you plan to create a gallery wall, larger frames will stand out beautifully. Measure your space in advance to ensure they fit perfectly.
2. Choose the Material
Next, think about the material of the frame. Wood, metal, and acrylic are popular choices. A rustic wooden frame can bring warmth and charm to your decor, while a sleek metallic frame offers a modern touch. If you’re going for a beach theme, consider driftwood or shells as embellishments. Each material has a different vibe, so select one that reflects your style as a bride and groom.
3. Consider Your Wedding Theme
Your wedding theme plays a vital role in your frame selection. Are you going for a vintage, modern, or rustic look? For a vintage theme, lace or ornate frames may be ideal. For a modern wedding, geometric shapes and clean lines work beautifully. Keep your wedding colors in mind as well; choosing frames that complement your color scheme will create a harmonious look.
4. Personalization Options
Personalization can make your frames even more special. Think about engraving your names, wedding date, or even a meaningful quote. Many DIY options allow you to customize frames with paint, stencils, or vinyl lettering. This can make your frames unique keepsakes to cherish long after the big day. Additionally, consider adding special embellishments like flowers or ribbons to enhance the overall design.
5. Budgeting
Set a budget before diving into your selection. Personalized photo frames can range from very affordable to quite luxurious, depending on the materials and intricacies. Determine how many frames you need and factor in any additional decoration costs. DIY frames can save money, but ensure you have the time and skills required for the project. Find a balance between style and affordability to create stunning frames without overspending.
6. Practicality
Finally, think about the practicality of the frames. Will they be used for the reception, or do you plan to give them as gifts? If they will be moved around a lot, lightweight materials might be best. Consider whether you want frames that stand alone or can be hung. Your choices should accommodate how you plan to display and enjoy your special moments.
Pro Tip: Gather inspiration by browsing online or visiting craft stores. Create a mood board to visualize how your selected frames will coordinate with your wedding theme and colors! This will help streamline your decision-making process and ensure everything is cohesive. Remember, the goal is to capture your special moments beautifully, so choose frames that resonate with your love story!
4. Floral Embellished Frame (Our Favorite!)
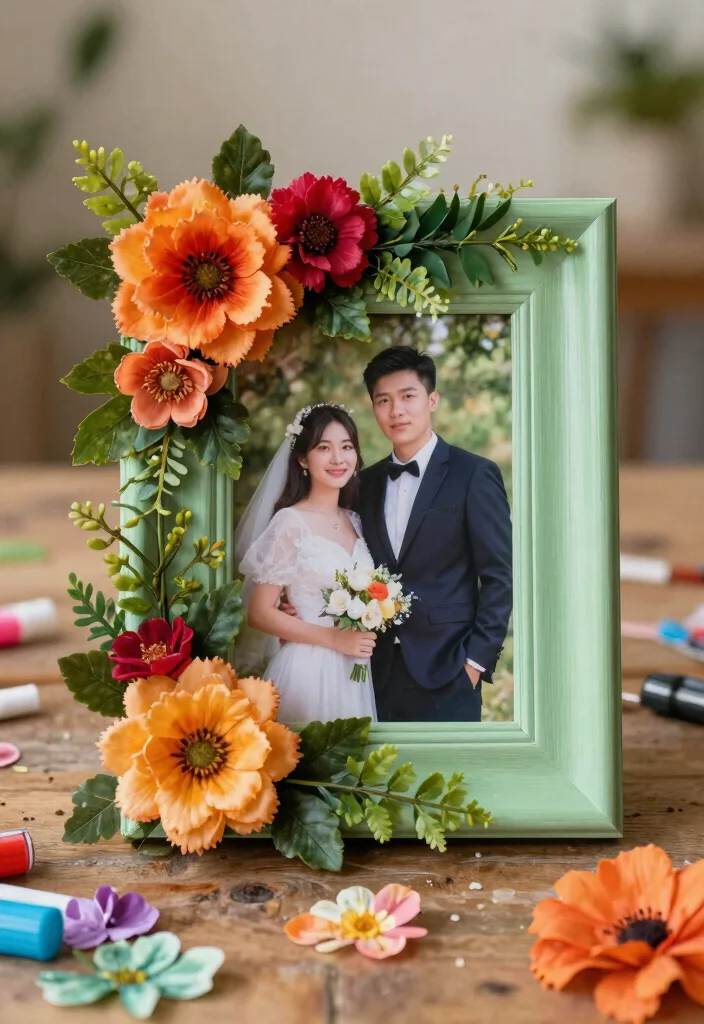
Add a delightful touch of nature to your wedding decor with a floral embellished frame. This design beautifully showcases your wedding photos while infusing color and life into the space.
Start with a standard wooden frame and paint it in a soft green or pastel hue. Once dried, use a hot glue gun to attach faux or dried flowers around the corners of the frame. You can select blooms that align with your wedding color palette for a personal touch. To finish, incorporate faux leaves for added greenery and a lush appearance!
Materials Needed:
– Wooden frame
– Soft acrylic paint
– Faux or dried flowers
– Hot glue gun and glue sticks
– Greenery embellishments
Tips: Opt for smaller flowers for a delicate effect, or larger blooms for a bolder presentation. This frame will serve as a lovely reminder of your special day!
Floral Embellished Frame (Our Favorite!)
Editor’s Choice


📹 Related Video: Floral Design DIY / How To Make Your Own Wedding GARDEN STYLE FLORAL ARCH / Ramon At Home
5. Chalkboard Frame
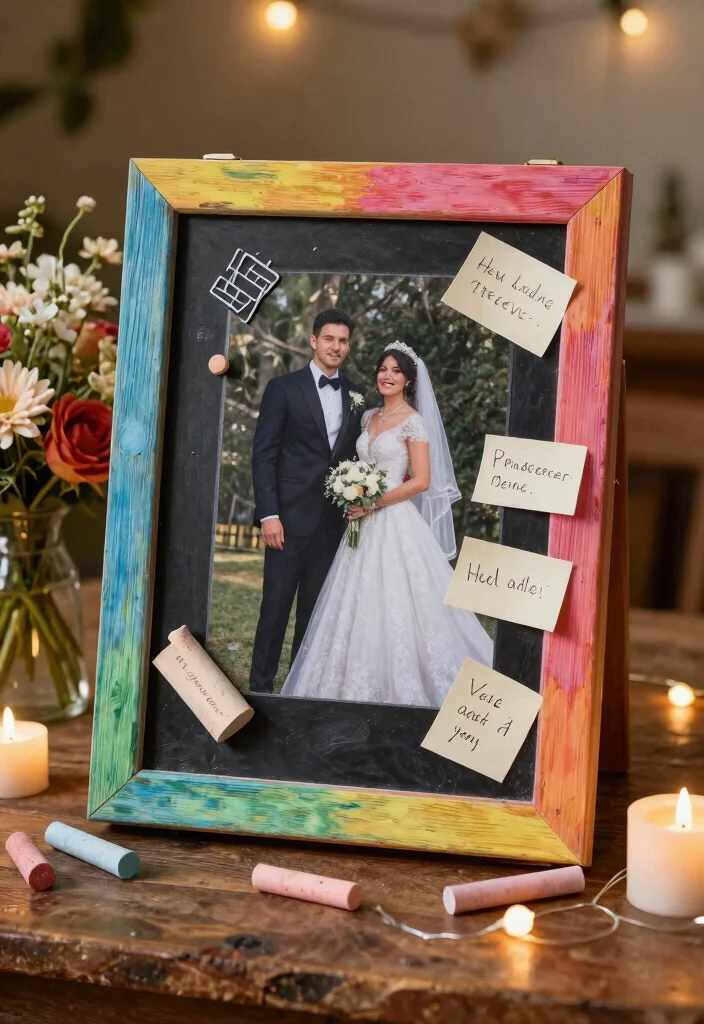
A chalkboard frame offers a fun and interactive method to showcase your wedding photos and messages! It’s a delightful addition to your reception décor, inviting guests to leave their signatures or personal notes.
Begin with a plain wooden frame and paint the inner section with chalkboard paint. Allow it to dry before using regular chalk to write quotes or notes around your chosen photo. Leave some space for guests to add their messages, making this frame a lasting memory beyond your wedding day.
Materials Needed:
– Wooden frame
– Chalkboard paint
– Regular chalk
Tips: Properly prepare the surface for better chalkboard paint adhesion. Choose a fun quote that captures your love story!
A chalkboard frame makes your wedding photos feel alive—guests sign, write little cheers, and you keep a living memory. With a DIY chalkboard frame, personalized photo frames become interactive keepsakes that grow sweeter with every note. It’s practical, fun, and keeps your memories beautifully on display.
Chalkboard Frame
Editor’s Choice


You might also like

6. Metallic Foil Frame
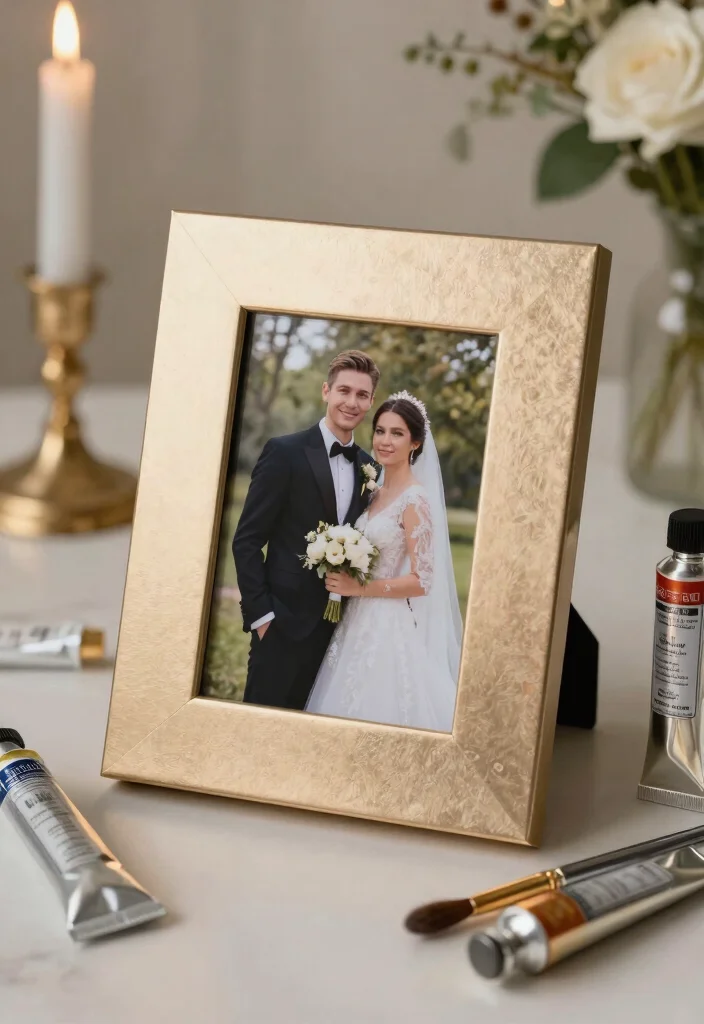
For a touch of luxury, a metallic foil frame adds a modern glam element to your wedding decor. This stunning frame shines brightly, perfectly accentuating your favorite moments.
Start with a wooden frame and paint it a matte color of your choice. Once dry, use adhesive to apply metallic foil in patches for a chic appearance. The result is a captivating contrast between matte and shiny finishes, ideal for celebrating your special day and a beautiful addition to your home decor.
Materials Needed:
– Wooden frame
– Matte paint
– Metallic foil
– Adhesive glue
Tips: Experiment with patterns like stripes or dots to create unique designs. This frame will surely stand out wherever you decide to showcase it!
7. Beach-Themed Frame
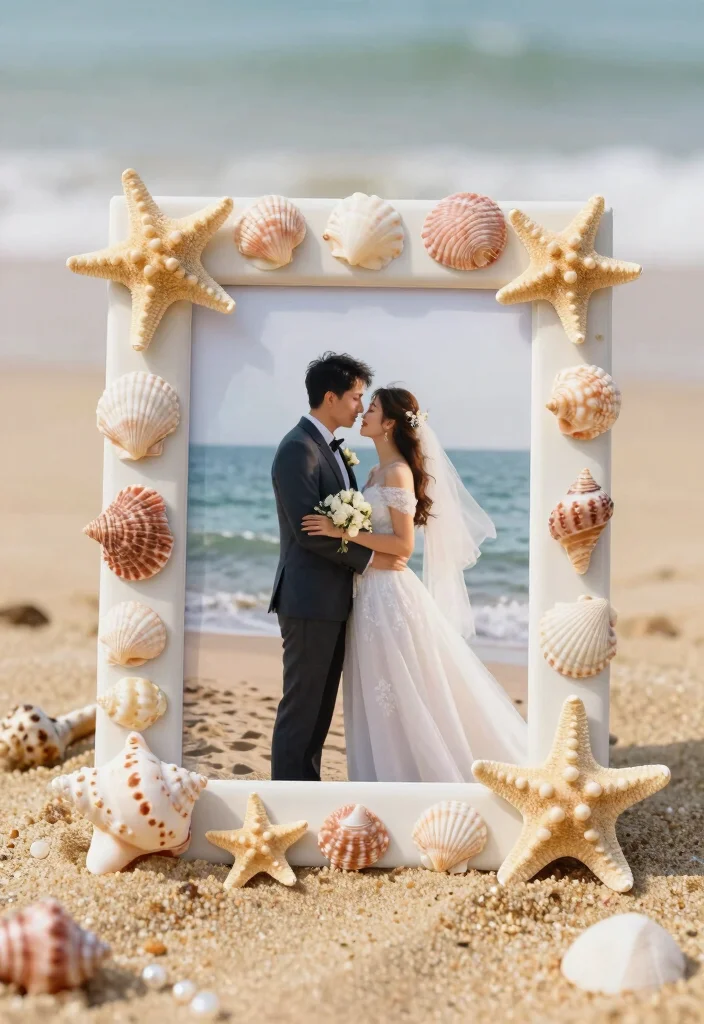
For couples who adore the beach, a beach-themed frame is a charming way to display your wedding memories. This design captures the carefree spirit of the coastline!
Start with a plain wooden frame and paint it in shades of ocean blue or sandy beige. Attach small seashells, sand, and starfish around the frame using strong craft glue. This creative touch will bring a stunning beach vibe, perfect for couples who tied the knot by the sea! Your guests will appreciate this unique element of your wedding decor.
Materials Needed:
– Wooden frame
– Beach-inspired acrylic paint
– Seashells, sand, starfish
– Strong craft glue
Tips: Ensure the decorations fit well on the frame’s surface. You might even create a mini beach scene within the frame for added charm!
Beach memories deserve frames that feel like a tide—calm, charming, and easy to swap. A beach-themed frame lets you showcase personalized photo frames as sea-kissed keepsakes by gluing in seashells and sand, without stealing the spotlight from your vows.
8. Shadow Box Frame

A shadow box frame allows you to create a layered display of keepsakes from your wedding day. It can hold cherished items like dried flowers, invitations, or any small mementos, making it both decorative and sentimental.
Select a simple shadow box and paint it in a color that complements your wedding theme. Arrange your keepsakes creatively inside, securing them with strong tape or glue. This frame beautifully showcases your love story and serves as a treasured keepsake for years to come!
Materials Needed:
– Shadow box frame
– Paint
– Keepsakes (flowers, invites, etc.)
– Strong tape or glue
Tips: Layer different items to create visual depth. Don’t forget to include a photo of the two of you!
9. Whimsical Photo Clip Frame
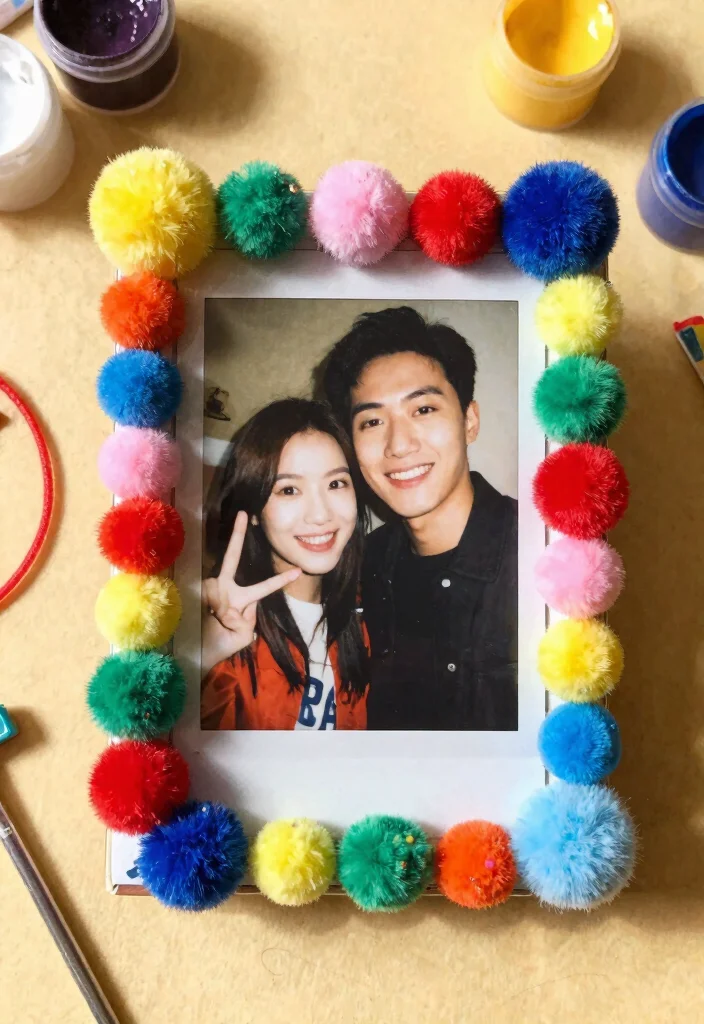
Introduce playful energy to your wedding decor with a whimsical photo clip frame! This fun design allows you to easily swap out pictures, making it perfect for a relaxed celebration.
Begin with a plain wooden frame and paint it in vibrant colors. Use wire or string to create clips that hold your photos. Enhance the whimsical feel by attaching colorful pom-poms or other fun embellishments! This design not only looks delightful but allows you to change your memories whenever you want.
Materials Needed:
– Wooden frame
– Bright acrylic paint
– Wire or string
– Clips
– Fun embellishments (pom-poms, etc.)
Tips: Let your creativity shine—use various colors for clips for an even more playful touch! This frame will surely bring smiles to your wedding guests!
You Might Also Like
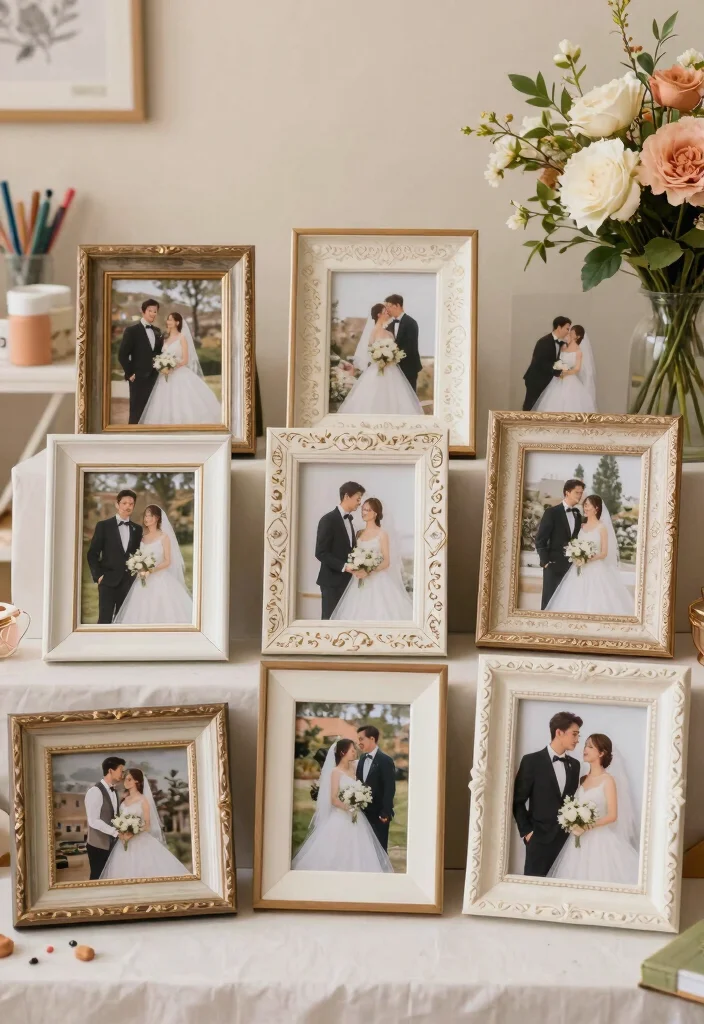
10. Upcycled Frame from Vintage Finds

If you have a passion for vintage items, why not upcycle them into stunning photo frames? This sustainable choice allows you to create something beautiful while being eco-friendly!
Visit local thrift stores or flea markets to discover old frames. Look for pieces with unique character—ornate designs or quirky shapes work beautifully. Clean them up and give them a fresh coat of paint, or leave them in their original state for authentic vintage charm. Fill them with your favorite pictures to create a one-of-a-kind decoration that sparks conversation!
Materials Needed:
– Vintage frames
– Acrylic paint (optional)
– Pictures or artwork
– Cleaning supplies
Tips: Mix and match different styles for an eclectic gallery wall. It will beautifully showcase your love story!
Upcycled Frame from Vintage Finds
Editor’s Choice


11. Personalized Name Frame
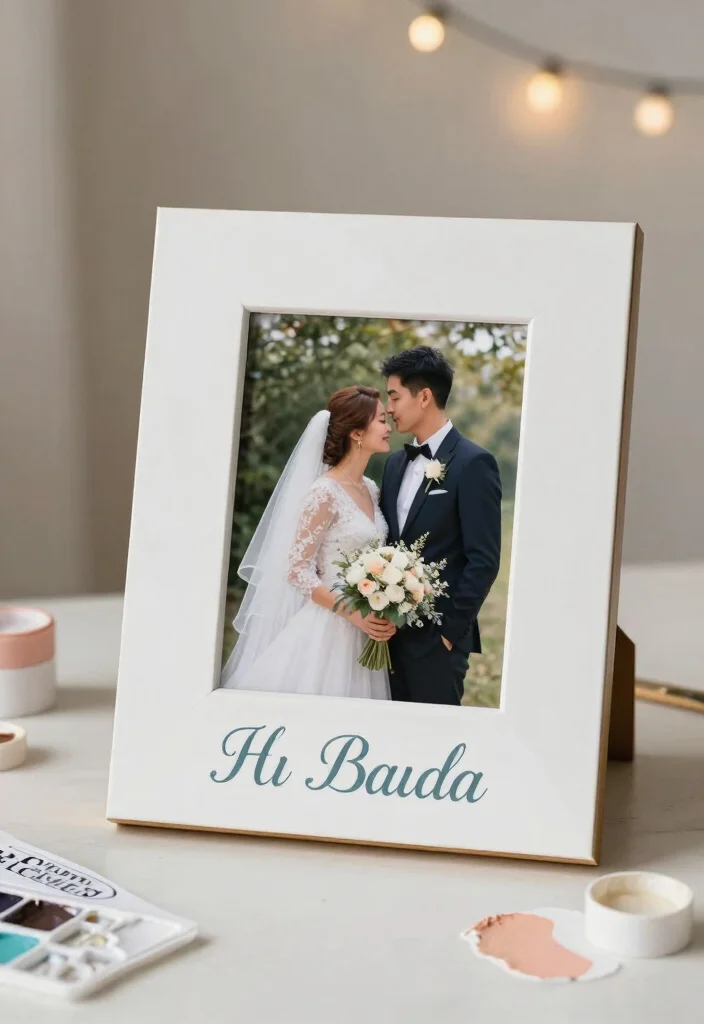
Add a special touch to your wedding photos with a personalized name frame! This thoughtful addition highlights your unique love story and the bond you share.
Start with a basic wooden frame and paint it in a color that resonates with you. Use a stencil to paint your names or initials at the bottom or top. You can even add your wedding date for a personal touch! This frame not only displays your cherished photo but also serves as a lovely reminder of your commitment to one another.
Materials Needed:
– Wooden frame
– Acrylic paint
– Stencil or stickers for names
– Craft glue
Tips: Experiment with font sizes and colors to create a design that reflects both of you! This frame will be a treasured keepsake for years to come!
Did you know that a simple personalized name frame makes wedding albums feel 2x more nostalgic? Craft your own with names, initials, and a wedding date—it’s a keepsake guests will notice and you’ll treasure.
Conclusion
There you have it, 11 gorgeous DIY wedding photo frames that will add a personal touch to your special day! Each frame not only serves as a beautiful display of your memories but also reflects your creativity and individual style.
Whether you choose a rustic look or something more modern, these personalized photo frames will make your wedding decor truly unique. Enjoy the crafting process and ensure each frame tells a part of your love story. Happy crafting!
Note: We aim to provide accurate product links, but some may occasionally expire or become unavailable. If this happens, please search directly on Amazon for the product or a suitable alternative.
This post contains Amazon affiliate links, meaning we may earn a small commission if you purchase through our links, at no extra cost to you.
Frequently Asked Questions
What materials do I need to create personalized photo frames for my wedding?
Start with a sturdy base frame and build your personalized photo frames from there. Gather a frame (wood, foam board, or acrylic) in your preferred style, decorative elements that match your wedding theme (washi tape, ribbon, lace, buttons, faux florals), and the right adhesives (hot glue or craft glue). Add backing (chipboard or thick cardboard) and photo mounting options (double‑sided tape or photo corners). Don’t forget a printer for inserts or printable mats, scissors, and a ruler. Optional: protective glass or clear acrylic to guard memories. With a cohesive color palette and room for bride and groom initials and the wedding date, you’re ready to frame your special moments beautifully.
How can I customize frames to reflect the bride and groom and celebrate special moments?
Personalize with initials, names, or the wedding date; add silhouettes or tiny charms; pick colors that match the palette; tuck in mementos from your journey (engagement ring box, lace from a dress, dried flowers); add quotes about love; include small 3D pieces; create a mini story board that highlights special moments like the first kiss or vows; place the frames in a rhythm across your venue.
Which DIY frame ideas are the fastest to make and most budget-friendly?
Among the 11 ideas, these are quick and budget-friendly options: printable chalkboard frames (paint the edge with chalkboard paint and write names/date), simple washi-tape frames (cover a plain frame with strips of wedding-colored tape), cork-board frames (cover with cork and use push pins for photos and notes), upcycled wood frames with a pop of paint, and plain photo mats you can print and mount with adhesive. To keep costs down, shop second‑hand frames and printable inserts, and reuse materials from other crafts. With a little hot glue and patience, you can finish these in an afternoon.
How should I plan the layout for a wedding photo frame gallery wall?
Plan by choosing a mix of sizes (4×6, 5×7, 8×10) and a unifying finish. Do a test layout on the floor or wall with paper cutouts to fix spacing (2–3 inches is a good rule). Decide between a tight grid or a salon-style arrangement; anchor the display with a larger piece (like an 11×14 featuring the couple). Keep a cohesive frame style for unity and arrange photos that tell the story of your special moments and bride and groom memories across the wall.
How can I protect wedding photos and ensure the frames last as keepsakes?
Protect prints with acid-free mats and backings, and put photos behind UV-protective glass or clear acrylic. Avoid direct sun exposure, humidity, and temperature fluctuations; use archival adhesives and avoid tape that can degrade over time. Choose durable frames and consider a light sealant for wooden frames if needed. This will help preserve your personalized photo frames for the bride and groom and special moments for years to come.
Related Topics
wedding DIY
personalized photo frames
bride and groom
special moments
easy crafts
rustic style
vintage design
budget friendly
quick projects
romantic decor
seasonal weddings
DIY wedding decor