Are you ready to take your crafting to the next level? With resin art being all the rage, it’s hard not to want to dive in. I created this post to share some of the most stunning resin art tutorials that can spark your creativity and inspire your next project. Whether you’re a seasoned crafter or just starting out, resin art offers endless possibilities that can suit any skill level.
If you love DIY projects and want to add a personal touch to your home decor or gifts, this post is for you. You’ll find a variety of creative ideas that cater to all tastes, from elegant coasters to whimsical magnets. Each tutorial is designed to guide you step-by-step, making it easy for you to achieve beautiful results. By the end, you’ll have the confidence to explore resin art and create pieces that truly reflect your style.
Get ready to explore twelve incredible resin art tutorials that will leave you inspired and excited to craft. Look out for #8—it’s a must-try that you won’t want to miss!
Key Takeaways
– Diverse Projects: This post features twelve different resin art tutorials, each offering a unique take on crafting with resin, from coasters to wall art.
– Step-by-Step Guidance: Each tutorial breaks down the process into simple steps, making it easy for anyone to follow along and create stunning pieces.
– Materials and Tips: You’ll learn about essential materials needed for each project, along with tips for achieving the best results.
– Creative Inspiration: Each tutorial is designed to inspire your creativity, encouraging you to personalize your work and make it truly your own.
– Perfect for All Levels: Whether you’re a beginner or an experienced crafter, these projects cater to various skill levels, so you can jump in no matter where you stand.
1. Colorful Resin Coasters
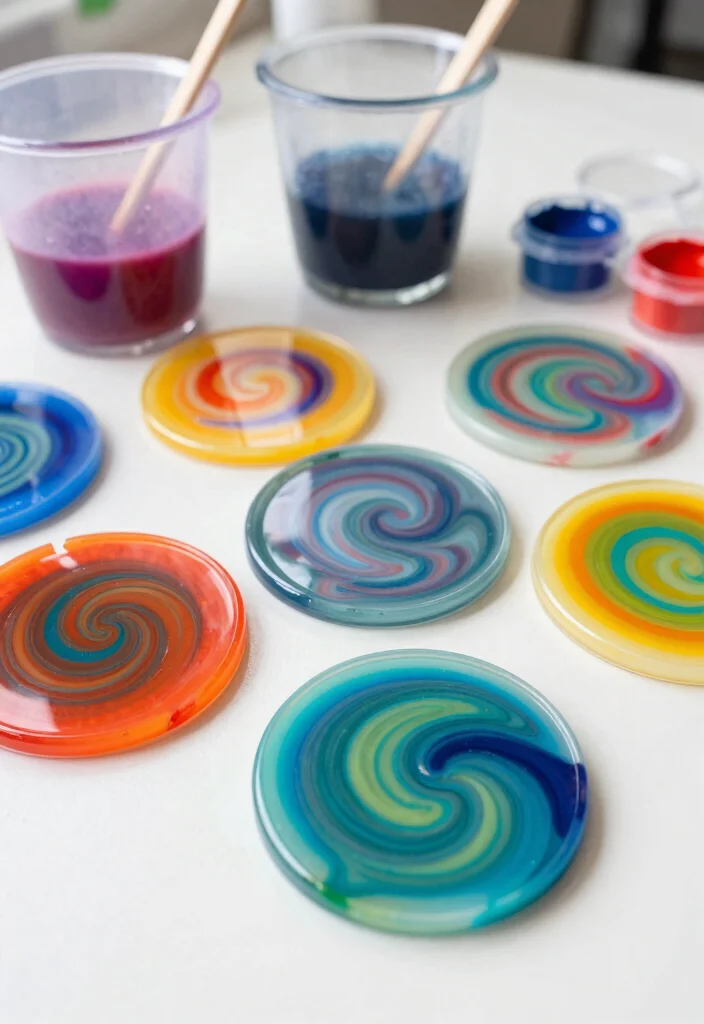
Imagine coasters that not only protect your surfaces but also add a splash of color to your home! Colorful resin coasters are a delightful way to express your creativity while being functional. You can choose your favorite color pigments and customize them to fit your style or decor theme perfectly.
Start by preparing your materials, such as clear epoxy resin, silicone molds, and mixing tools. Mix the resin as per the instructions, then separate it into different cups for varying colors. Pour the colored resin into the molds, and create unique swirls or layers for stunning effects. After a few hours, you’ll have coasters that showcase vibrant colors and a glossy finish!
Key steps to craft your coasters:
– Gather clear epoxy resin and silicone molds
– Mix resin and add color pigments
– Pour into molds, creating unique designs
– Allow to cure for beautiful, functional art
These coasters are not only eye-catching but also make perfect gifts for friends and family.
Colorful Resin Coasters
Editor’s Choice


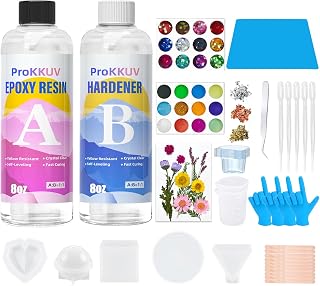
How To Choose Resin Art Supplies
Choosing the right supplies for your resin art projects is crucial to achieving stunning results. Here are some key factors to consider when selecting your materials:
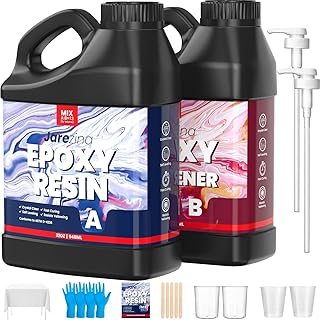
1. Type of Resin
There are different types of resin available, including epoxy resin and UV resin. Epoxy resin is great for larger projects and gives a strong finish, while UV resin cures quickly under UV light, making it ideal for smaller crafts. Knowing what type best suits your project will set you up for success.
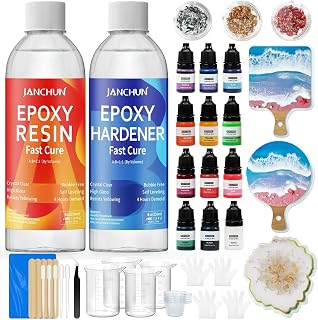
2. Colorants & Additives
The colorants you choose can dramatically alter the look of your resin art. Use alcohol inks for vibrant colors or powdered pigments for a more opaque finish. Consider also glitter, beads, or other add-ins to enrich your artwork. Always test a small amount first to see how it reacts with your resin.
3. Molds
Resin molds come in various shapes and sizes. Silicone molds are the most popular because they are flexible and easy to use. Make sure the mold can withstand the heat generated during curing. Check the size and shape of the mold to ensure it fits your vision for the piece.
4. Safety Gear
Safety is paramount when working with resin. Always wear gloves and a mask to protect yourself from fumes. Ensure you work in a well-ventilated area to avoid inhaling harmful chemicals. Investing in good safety gear will help you enjoy crafting without worry.
5. Budget
Resin art can vary in cost, so set a budget before you start shopping. You don’t have to buy the most expensive supplies, but quality matters. Research and compare prices of different brands to find the best products that fit your budget.
Pro Tip: Always read the instructions on your resin products for specific requirements, such as mixing ratios and curing times. Keeping a notebook of your experiments can help you track what works best for your unique style!
Choosing the right resin art supplies can make a significant difference in your crafting experience. By considering the type of resin, colorants, molds, safety gear, and your budget, you’ll be well on your way to creating beautiful resin art pieces. Happy crafting!
2. Ocean-Inspired Art

Bring the soothing vibes of the ocean into your home with ocean-inspired resin art! This creative project allows you to capture the beauty of waves and sea colors in a stunning piece. Using ocean-themed pigments like teal and blue, you can create a breathtaking artwork that transports you to the beach every time you see it.
Begin by preparing clear epoxy resin and mixing in your chosen colors. Start with darker tones for the ocean depths, gradually transitioning to lighter shades for the foamy waves. Pour the resin onto a canvas or mold, then use a heat gun to create realistic wave effects.
Steps to create your ocean art:
– Gather clear resin and ocean-themed pigments
– Mix colors, starting from dark to light
– Pour onto canvas, using heat for wave effects
– Let it cure for a coastal masterpiece
Once complete, your artwork will remind you of serene beach days, making it a perfect addition to your living space or a thoughtful gift.
Ocean-Inspired Art
Editor’s Choice


3. Dazzling Resin Jewelry
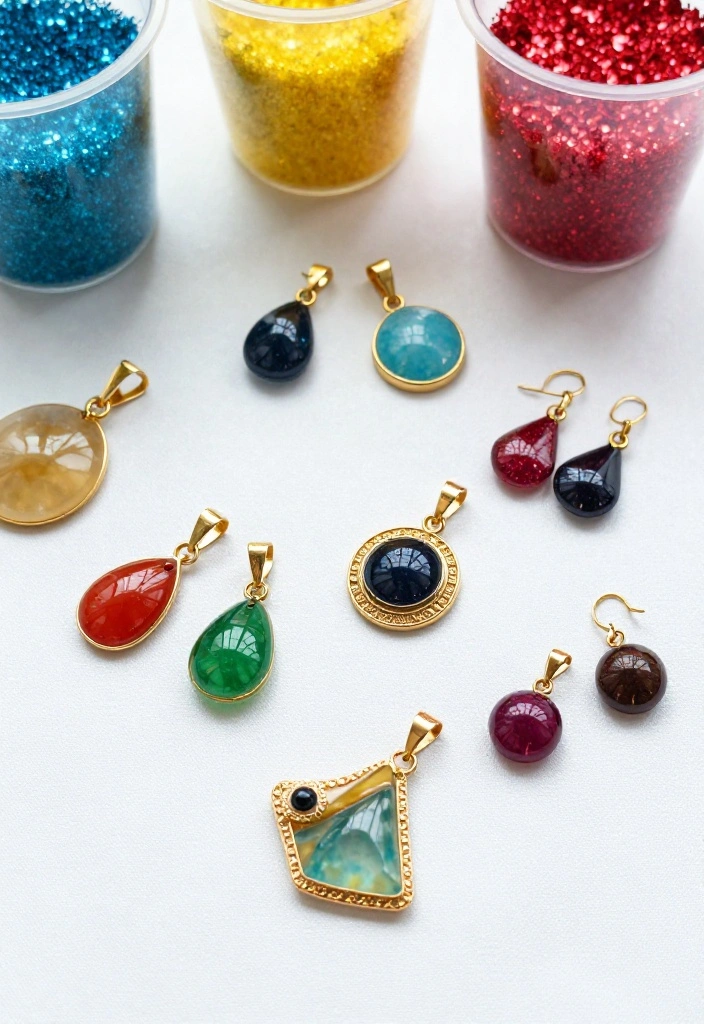
Create eye-catching resin jewelry that showcases your unique style! With endless design possibilities, you can craft beautiful necklaces and earrings that sparkle with color and creativity. This project is a wonderful way to express your artistic flair while making stunning accessories.
Gather your materials, including epoxy resin, jewelry molds, and decorative elements like glitters and dried flowers. Start by mixing the resin and adding your chosen colors or embellishments. Pour the mixture into the molds and allow it to cure completely before removing.
Steps to create dazzling jewelry:
– Use epoxy resin and jewelry molds for your designs
– Mix in color pigments and decorative elements
– Pour into molds, then let cure fully
– Attach findings to complete your unique pieces
These handmade creations not only elevate your style but also make thoughtful gifts or even items to sell at local markets.
Dazzling Resin Jewelry
Editor’s Choice


4. Geode-Inspired Resin Art
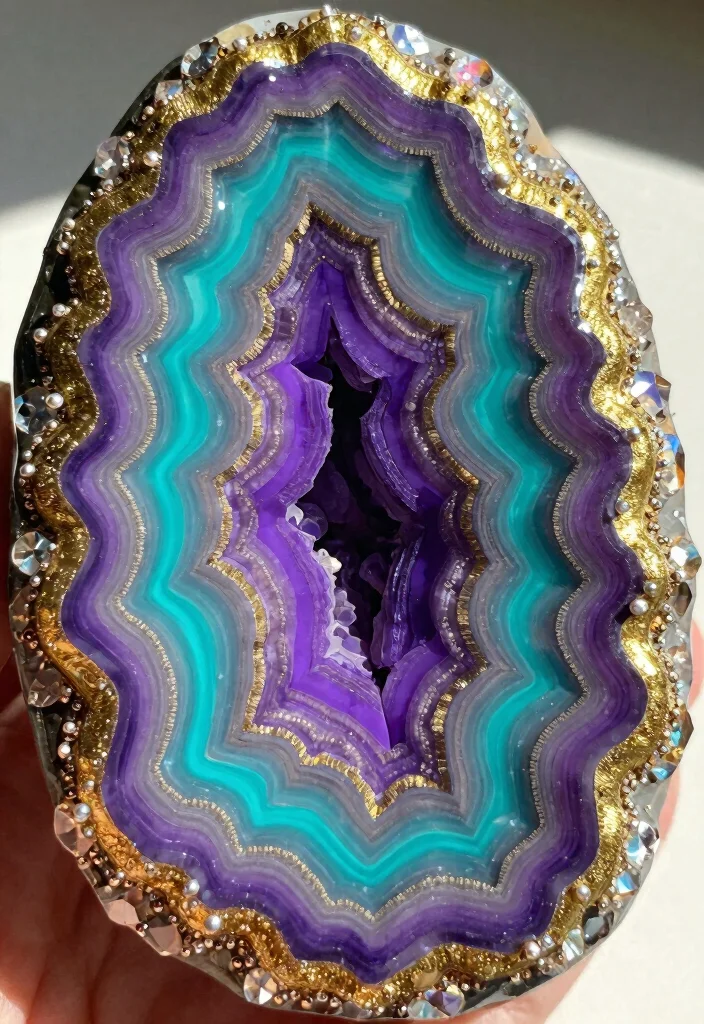
Explore the elegance of geode-inspired resin art, where creativity meets sophistication! This stunning trend mimics the layered beauty of natural geodes with colorful resin and sparkling crystals. You’ll be amazed at how easy it is to create these artistic pieces that serve as striking decor.
Gather your supplies, including clear resin, color pigments like amethyst and teal, and optional crystal embellishments. Mix the resin and layer the colors to replicate the natural formations found in geodes. Pour the mixture onto a canvas or mold, and use a heat gun for swirling effects.
Key steps for your geode art:
– Collect clear resin and color pigments
– Mix and layer colors to mimic natural geodes
– Pour into molds, adding crystals if desired
– Allow to cure for stunning decor pieces
Once cured, these artworks will be captivating additions to your home, perfect for coasters or wall displays.
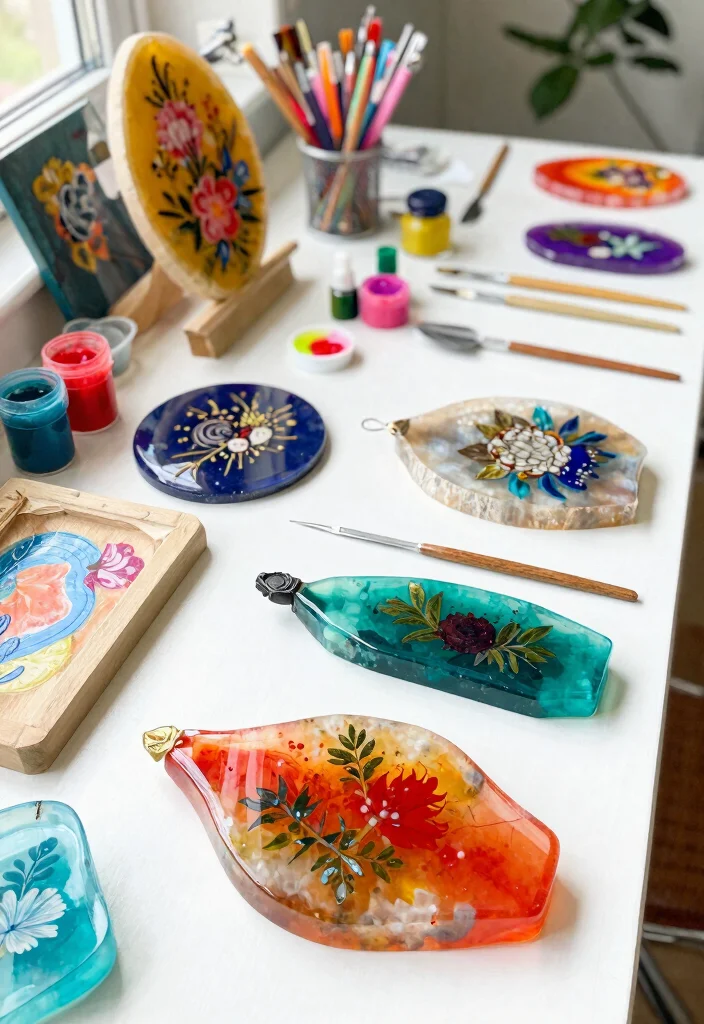
5. Resin Flower Tabletops
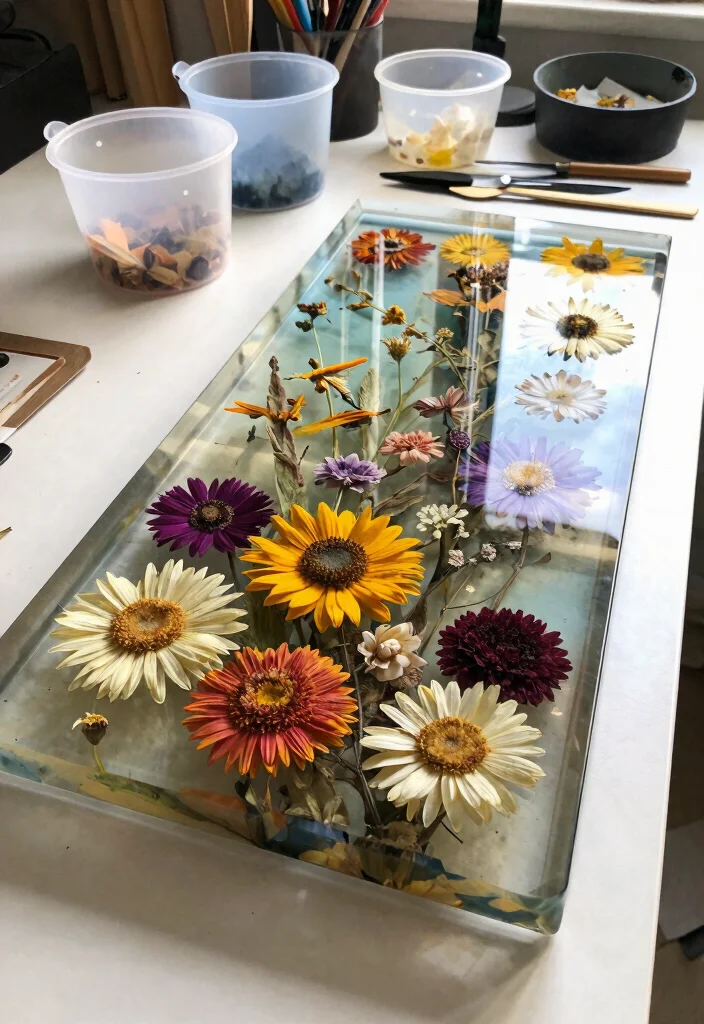
Bring the essence of nature indoors with beautiful resin flower tabletops! This project encapsulates dried flowers in resin, resulting in functional art that’s perfect for any home. Each piece tells a unique story, showcasing your favorite blooms in a mesmerizing way.
Start by gathering clear epoxy resin, dried flowers, and a large tabletop mold. Mix the resin and pour a layer into the mold. Carefully arrange the flowers and cover them with more resin, allowing it to cure completely.
Steps to create stunning tabletops:
– Gather clear epoxy resin and dried flowers
– Mix resin and pour a layer into the mold
– Arrange flowers, then cover with more resin
– Allow to cure for a unique furniture piece
The result is a one-of-a-kind tabletop that beautifully reflects your style and love for nature.
Fun fact: DIY resin art tutorials show that pouring in 1/8-inch layers and letting each cure keeps dried flowers vibrant for tabletop art. Layering reduces bubbles and creates a durable, functional centerpiece.
6. Personalized Resin Keychains
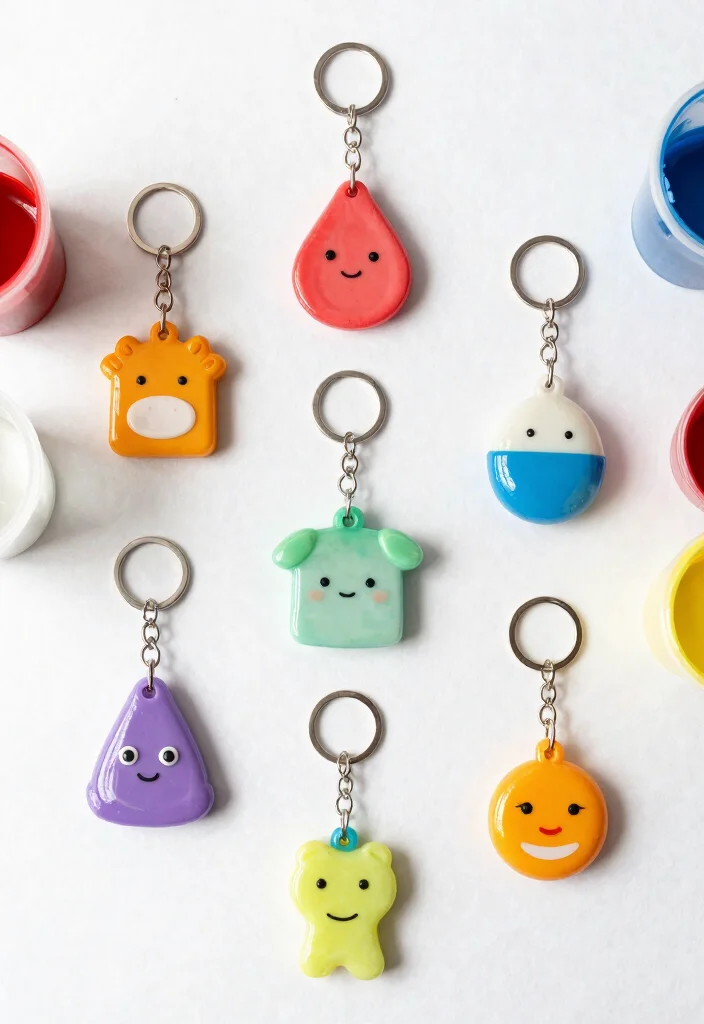
Create unique and practical resin keychains that showcase your personality! These fun projects not only help organize your keys but also make wonderful gifts for friends and loved ones. You can customize them with colors and designs that truly represent you.
Gather your materials, including clear epoxy resin, keychain molds, and decorative elements. Mix the resin and pour it into the molds, adding your favorite colors or even small personal items like initials. After curing, attach the keychain hardware for a finished piece.
Steps to make personalized keychains:
– Collect clear resin and keychain molds
– Mix in colors or personal items
– Pour into molds and let cure
– Attach hardware for functional accessories
These keychains are a delightful way to express creativity while being practical!
Fun fact: 68% of crafters who tackle resin art tutorials start with simple keychain molds and clear epoxy, and 9/10 say personalized designs make gifts extra meaningful. Take 15 minutes to plan colors, then pour in layers for a crisp, gift-ready finish.
📹 Related Video: How to make resin keychain for Beginners | Personalize Resin Keychains | resin art ideas
You might also like

7. Resin Wall Art
Transform your living space with stunning resin wall art that reflects your style! This creative project allows you to design beautiful pieces that can brighten up any room. With just a few supplies, you can create eye-catching art that serves as a focal point in your home.
Gather clear epoxy resin, a large canvas or wooden board, color pigments, and decorative elements. Mix the resin and pour it onto the canvas, using various colors to create dynamic layers or patterns. Enhance your design with dried flowers or glitter before it cures.
Steps to craft your wall art:
– Use clear epoxy resin and a canvas
– Mix colors and pour onto the surface
– Add decorative elements for flair
– Let cure for a beautiful wall display
This artwork not only adds charm to your home but also makes for thoughtful gifts that showcase your creativity.
Resin Wall Art
Editor’s Choice


8. Whimsical Resin Magnets (You MUST Try This!)
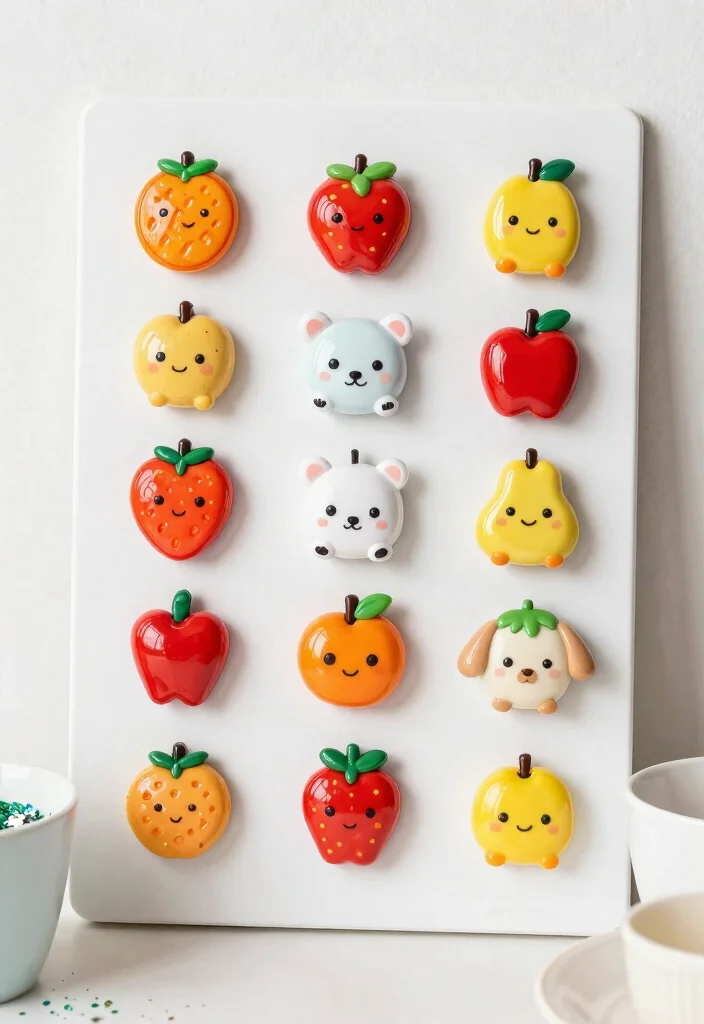
Brighten up your fridge with fun and whimsical resin magnets! These playful creations are not only easy to make but can be customized to match any style. You’ll love how they add a personal touch to your kitchen while being functional.
Gather your supplies, including clear resin, silicone molds in fun shapes, color pigments, and magnets. Mix the resin and pour it into the molds, filling them with vibrant colors or glitter. Once cured, attach the magnets to the back for a delightful touch to your fridge.
Steps to create whimsical magnets:
– Collect clear resin and fun-shaped molds
– Mix colors and pour into molds
– Attach magnets after the resin cures
– Enjoy personalizing your kitchen decor
These magnets are perfect for crafting with kids or as unique gifts that bring joy to any space!
9. Resin Art Phone Cases
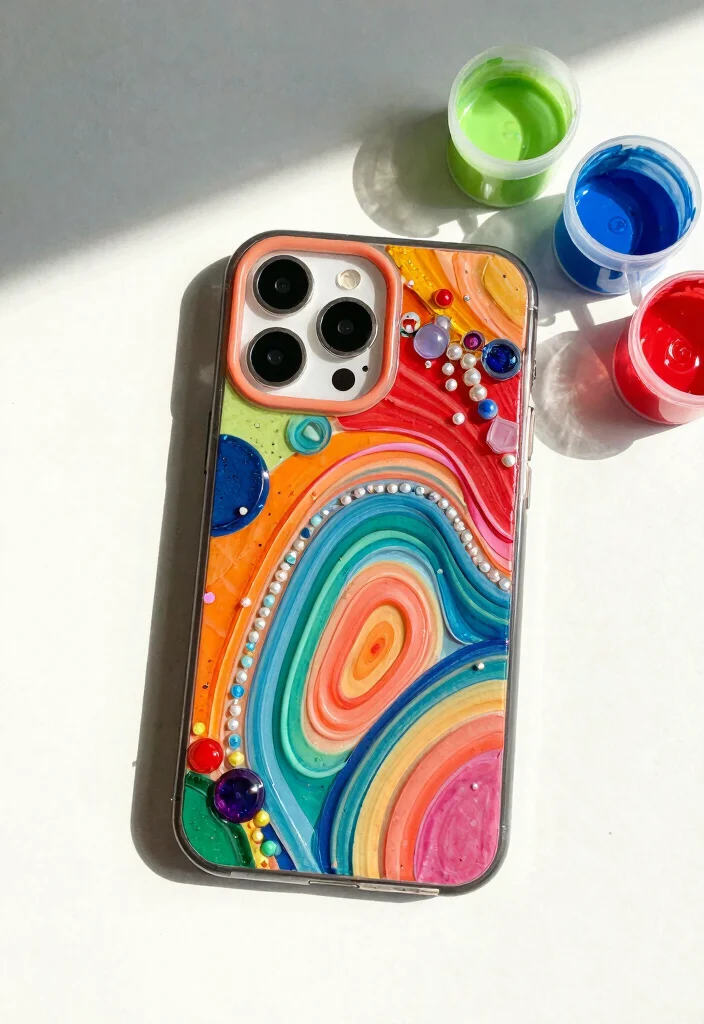
Give your phone a stylish makeover with personalized resin art phone cases! These unique creations not only protect your device but also let your personality shine through. You can mix colors and designs to ensure your phone case stands out in a crowd.
Gather clear epoxy resin, silicone phone case molds, color pigments, and decorative elements. Start by mixing your resin and coloring it to your liking. Pour the mixture into the mold, adding decorative items as desired. Once set, you’ll have a one-of-a-kind phone case to show off!
Steps to craft your phone case:
– Use clear epoxy resin and silicone molds
– Mix in colors and decorative elements
– Pour into mold and let cure
– Enjoy your unique and stylish phone case
With endless design possibilities, your phone case will always be a conversation starter!
Did you know 92% of resin art enthusiasts start with simple phone-case projects? With resin art tutorials, you can layer pigments and embed charms for a truly personal phone case.
10. Resin Serving Trays
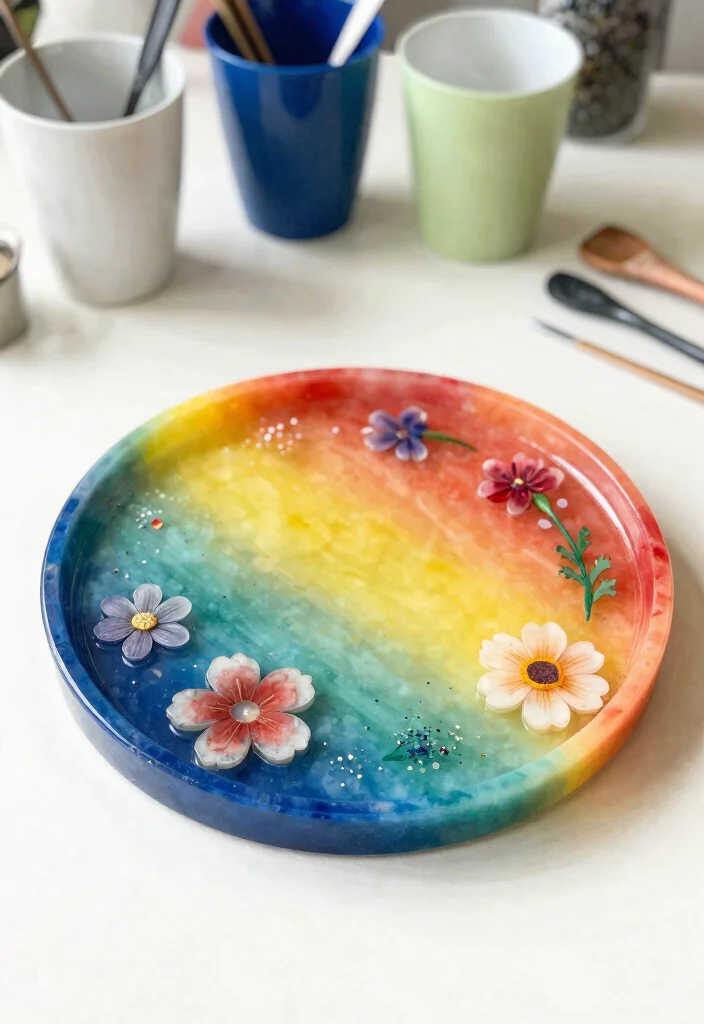
Elevate your hosting experience with beautiful resin serving trays! Perfect for entertaining or everyday use, these trays can be tailored to match your personal style. They not only serve a practical purpose but also add a touch of elegance to your gatherings.
Gather materials like clear epoxy resin, large silicone tray molds, color pigments, and decorative elements. Mix your resin and pour it into the tray molds, incorporating colors and embellishments for a stunning finish. Once cured, you’ll have a unique serving piece that impresses guests.
Steps to create your serving tray:
– Collect clear epoxy resin and tray molds
– Mix colors and pour into molds
– Allow to cure for functional art
– Customize with personal touches for a unique gift
These trays are perfect for impressing guests or gifting to friends, showcasing your creativity!
You Might Also Like
11. Unique Resin Bookmarks
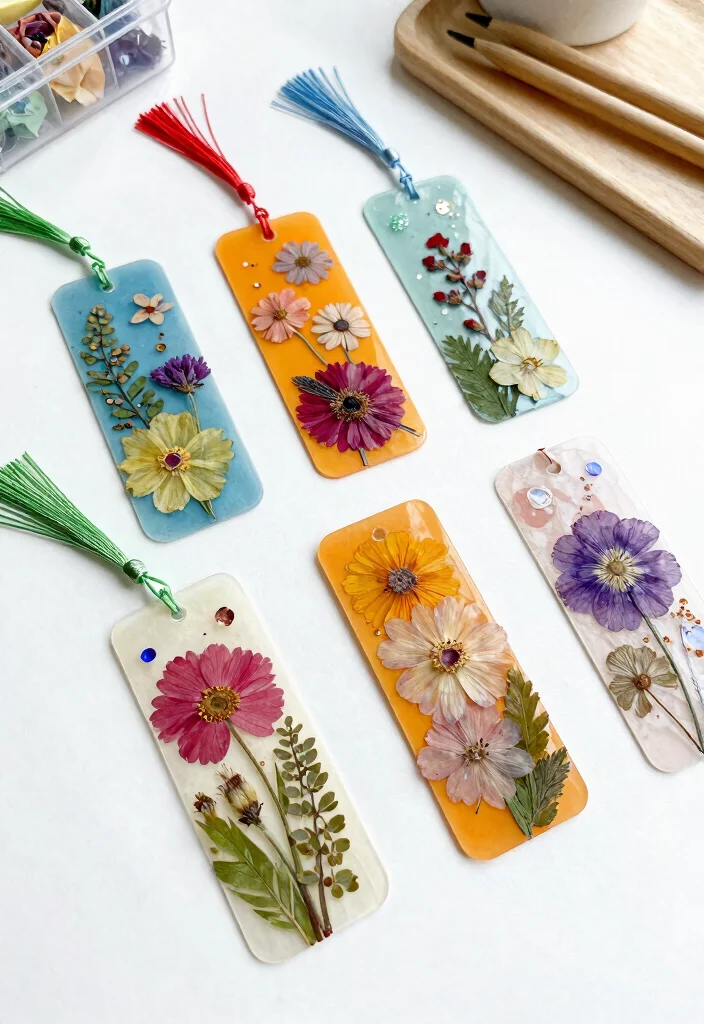
Make reading a more enjoyable experience with unique resin bookmarks! These charming pieces not only keep your place but also add a touch of beauty to your books. You’ll love how they can be customized to reflect personal interests or favorite colors.
Gather materials such as clear epoxy resin, bookmark molds, color pigments, and decorative items like pressed flowers. Mix the resin and pour it into the molds, adding flair with your chosen elements. After curing, attach jump rings to complete your bookmarks.
Steps to create unique bookmarks:
– Use clear epoxy resin and bookmark molds
– Mix in colors and decorative elements
– Pour into molds and let cure
– Attach jump rings for a finished look
These bookmarks make fabulous gifts for book lovers and can easily be tailored to suit anyone’s taste!
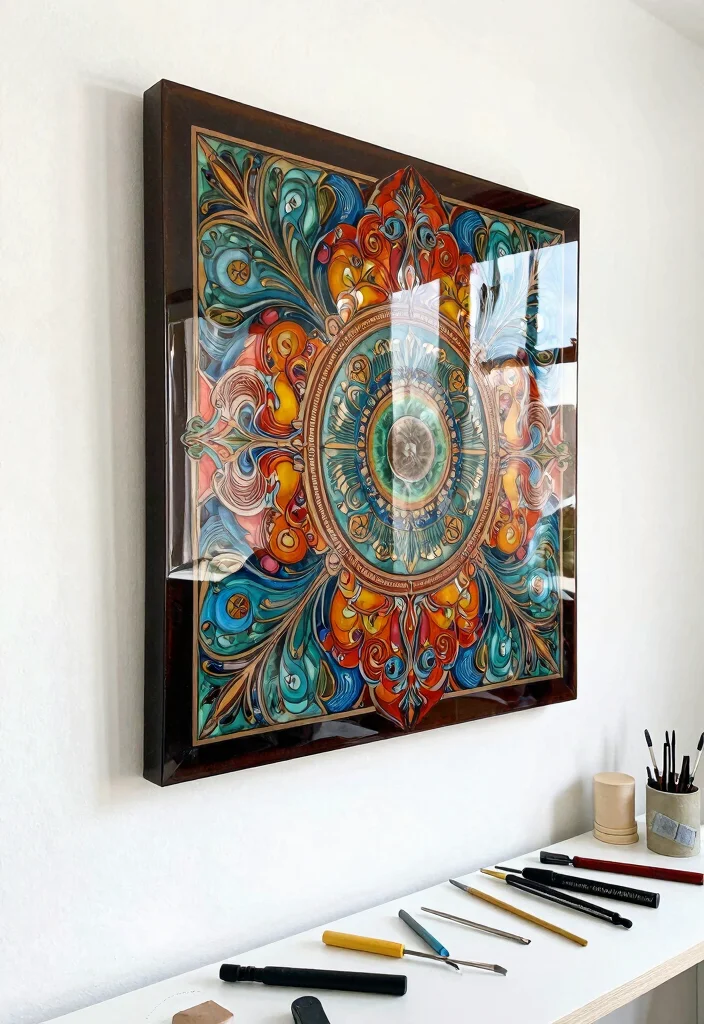
12. Abstract Resin Art Panels
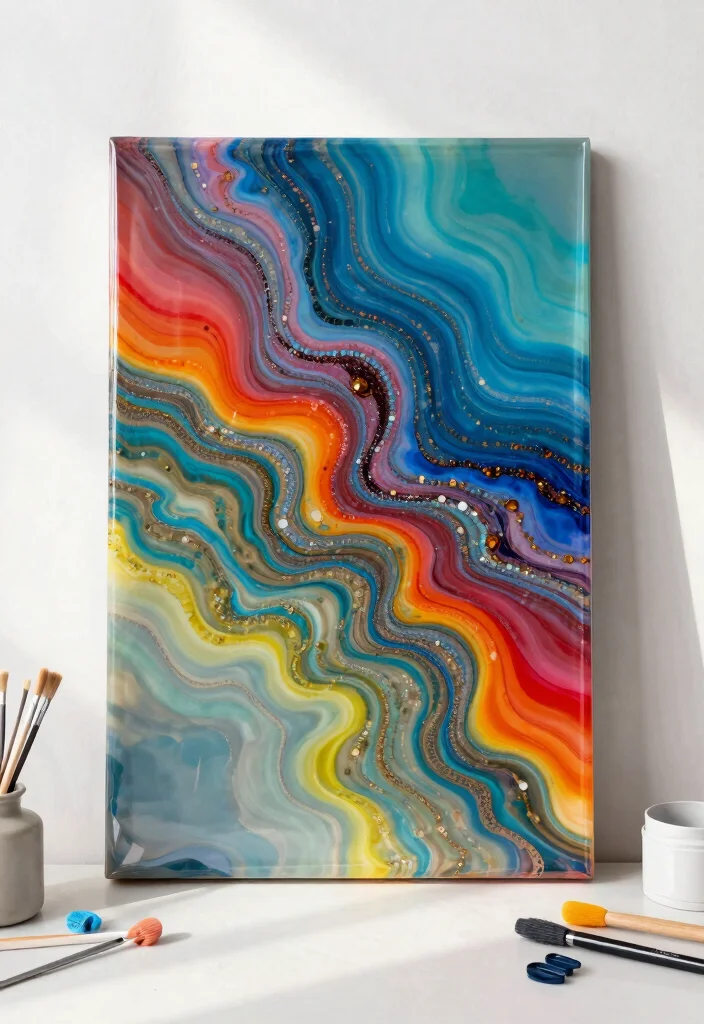
Create stunning abstract art panels that add flair to any room! This project allows you to explore your artistic side through free-form designs that are entirely unique. With the right materials, you can produce captivating pieces that serve as striking decor.
Gather clear epoxy resin, a large canvas or board, various color pigments, and silicone tools for manipulation. Start by mixing the resin and pouring different colors onto your canvas. Use the silicone tools to swirl and manipulate the resin for a truly original look.
Steps to create abstract art panels:
– Collect clear epoxy resin and a canvas
– Mix colors and pour onto the surface
– Use tools for unique designs
– Let cure for a show-stopping piece
This artwork can become a focal point in your home and is a fantastic gift for art lovers, showcasing the beauty of creativity.
Abstract Resin Art Panels
Editor’s Choice

Conclusion
Resin art is not just a craft; it’s a way to express creativity and transform everyday items into stunning pieces of art. With these 12 tutorials, you have a variety of projects to dive into, each one offering unique artistic possibilities and endless fun.
Whether you’re making gifts for loved ones or crafting pieces for yourself, allow your imagination to run wild and embrace the beauty of resin art. So, gather your supplies and start creating—you never know what masterpiece awaits!
Note: We aim to provide accurate product links, but some may occasionally expire or become unavailable. If this happens, please search directly on Amazon for the product or a suitable alternative.
This post contains Amazon affiliate links, meaning we may earn a small commission if you purchase through our links, at no extra cost to you.
Frequently Asked Questions
What are the best resin art tutorials for beginners to start with?
Great place to start is with resin art tutorials that are clearly labeled step-by-step or beginner friendly. In this roundup of 12 stunning resin art tutorials, you’ll find approachable projects that walk you through every stage—from prep to cure. Practical starter steps include: set up a clean, well-ventilated workspace and wear protective gear; measure and mix your resin and hardener precisely in a 1:1 ratio; use small test pours to practice color mixing and avoid waste; pour in thin, even layers to minimize bubbles and ensure a smooth finish; allow adequate cure time between layers, and keep notes on temps and times to improve with each project. And if you’re curious about the standout pick, tutorial #8 is highlighted for its beginner-friendly approach and creative ideas.
How can I follow a step-by-step resin art tutorial to recreate a stunning piece?
To recreate a piece from a step-by-step resin art tutorial, start by reading the entire guide, then gather all materials before you begin. Prep your surface and workspace, then follow the instructions in order, mixing resin and hardener exactly as directed. After pouring, use a torch or heat gun briefly to pop any surface bubbles, and add colorants or inclusions as indicated. Allow each layer to cure fully before adding the next, and keep notes on temperature and cure times to replicate success in future projects. With patience and careful following of the guide, you’ll achieve a beautiful finish you can be proud of.
Which tutorial in the list offers the most creative ideas, and what can I learn from #8?
Across the 12 tutorials, you’ll see a range of creative ideas like layered color blends, embedded objects, and marbled effects. Tutorial #8 is especially noted for its bold color play and practical, easy-to-follow steps. Watching it will teach you how to plan color order, mix pigments effectively, and manage resin flow for a clean, professional look. If you’re after inspiration that’s both artistic and actionable, #8 is a must-watch in this collection.
What safety tips should I know before starting resin art tutorials?
Safety comes first with resin art tutorials. Always protect your skin, eyes, and lungs: wear gloves, safety glasses, and work in a well-ventilated area. Prepare a dedicated, washable workspace and surface cover to simplify cleanup. Read the resin’s safety data sheet, measure and mix in proper cups, and avoid skin contact with uncured resin. Work at room temperature, and keep pets and children away during mixing and curing. Following these safety tips will help you enjoy resin art tutorials with peace of mind.
What are common issues in resin art tutorials and how can I fix them?
Common issues include bubbles, hazy or dull finishes, and color separation. To fix bubbles, pop them with a careful pass of a torch or heat gun after pouring, then avoid overheating. For clarity and a smooth finish, ensure your resin and hardener are mixed thoroughly but gently, and pour in thin, even layers. If colors streak or separate, use compatible pigments and stir slowly until evenly distributed before pouring. By anticipating these issues and applying simple fixes, you’ll maximize your chances of a flawless piece from any resin art tutorials.
Related Topics
resin art tutorials
step-by-step guides
creative resin projects
beginner friendly
advanced techniques
DIY home decor
epoxy resin crafts
color mixing tips
seasonal crafts
artistic styles
quick crafts
resin pouring methods