Are you ready to dive into the world of paper mache art? It’s a fantastic medium that invites creativity and expression. I created this post because I believe everyone can enjoy the fun of crafting with paper mache. Whether you’re a beginner or a seasoned artist, you can find something special in this collection of techniques. The joy of making something with your own hands is hard to beat, and paper mache offers endless possibilities for imaginative projects.
If you’re someone who loves DIY crafts or is on the lookout for fresh art ideas, you’re in the right place. This guide is designed for artists, crafters, and anyone who enjoys creating unique pieces. You’ll find methods that spark inspiration and awaken your creativity. From classic techniques to quirky projects, there’s something to excite every maker.
In this post, I’ve pulled together 21 stunning paper mache methods that are not just visually appealing but also feasible for various skill levels. You’ll discover different techniques that can help you elevate your art projects, whether you’re working on decorations, functional items, or even playful crafts. Each method is designed to inspire you and add a sprinkle of fun to your crafting sessions. Let’s get started on this colorful adventure!
Key Takeaways
– Diverse Techniques: Explore a variety of paper mache art techniques that cater to different styles and projects, ensuring there’s something for everyone.
– Inspiration and Ideas: Each of the 21 methods serves as a launching pad for your creativity, providing unique ideas that can be adapted to your personal projects.
– Easy to Follow: The guide offers clear, actionable steps for each method, making it easy to get started, regardless of your experience level.
– Fun Projects: From masks to puppets and lanterns, discover how to create fun, imaginative items that can add charm to any setting or occasion.
– Eco-Friendly Options: Many techniques emphasize upcycling materials, showing how to create art while being mindful of the environment.
1. Classic Balloon Method
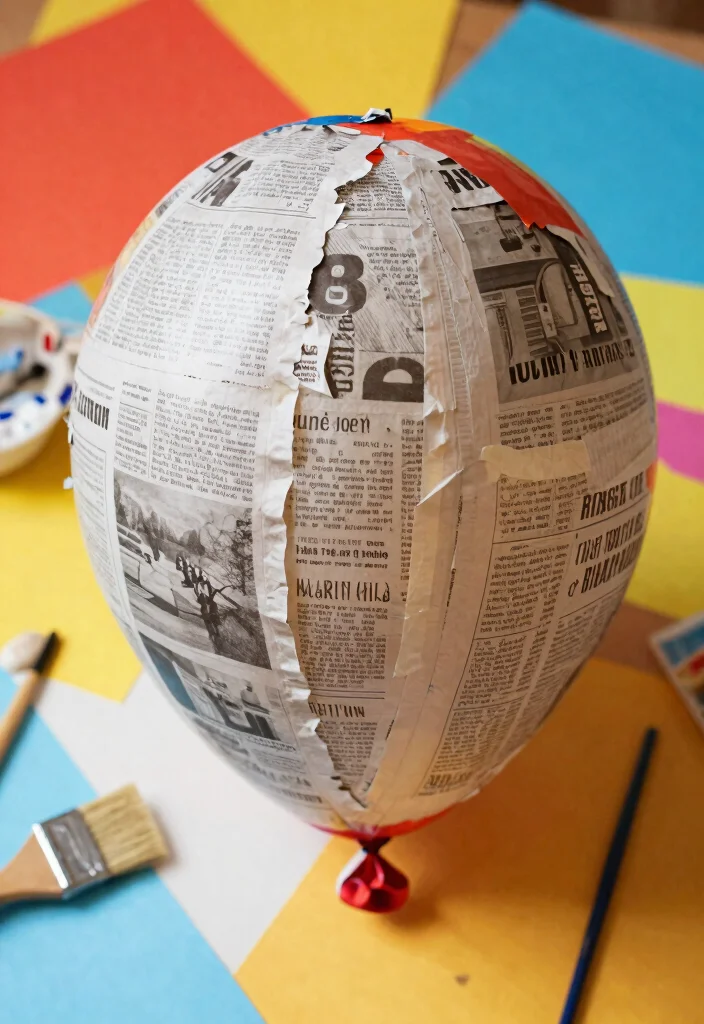
Looking for a fun and easy way to start with paper mache? The classic balloon method is your perfect entry point. It allows you to craft anything from playful bowls to imaginative characters using just a balloon and some paper. Once your creation dries, popping the balloon reveals a sturdy masterpiece that’s both lightweight and durable.
Begin by inflating a balloon to your desired size for the project. Mix equal parts flour and water to create a paste, then tear strips of newspaper to dip in the paste. Lay the strips on the balloon, overlapping until fully covered, and let it dry completely before popping the balloon.
Key steps to master this technique:
– Inflate a balloon to your chosen size
– Create a paste using flour and water
– Tear newspaper strips and dip them in the paste
– Cover the balloon with overlapping strips
This method is not only simple but opens up a world of creative possibilities. Challenge yourself to design themed decor that can brighten up any space!
Classic Balloon Method
Editor’s Choice


2. Sculpting with Wire Armature
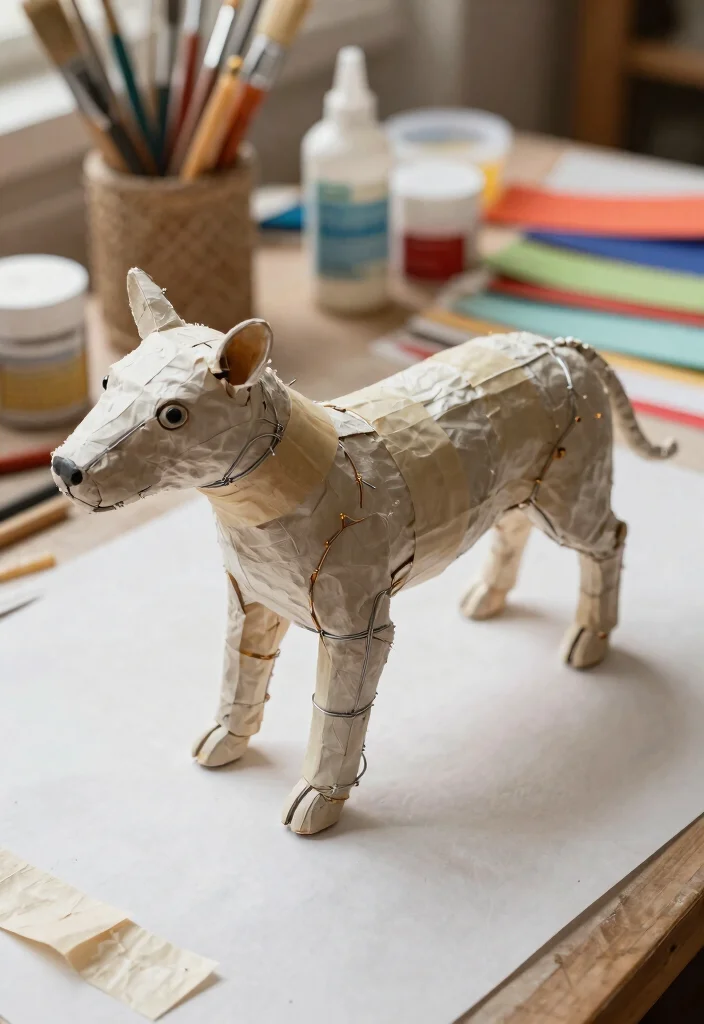
Want to take your paper mache projects to the next level? Using a wire armature provides the strength needed for more complex designs. This technique is perfect for creating detailed sculptures, from animals to human figures, giving you a solid framework to work with while allowing flexibility in your final creation.
Start by shaping thick, flexible wire into your desired form. Wrap it in masking tape to add some texture, then layer paper mache over the armature using the classic method. Once your sculpture is dry, unleash your creativity with paint or other decorations.
Get started with these steps:
– Shape wire into your desired design
– Wrap wire with masking tape for texture
– Apply paper mache layers over the armature
– Finish with paint or decorations
This method is fantastic for large projects and lets you customize your piece’s proportions perfectly!
3. Using Cardboard as Base
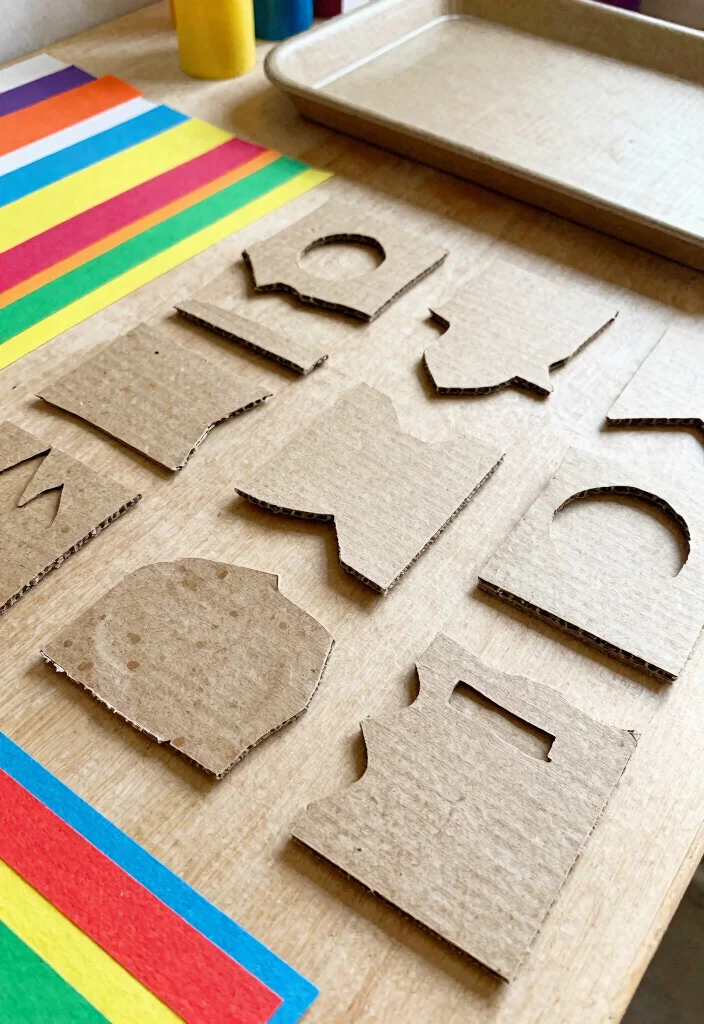
Cardboard is a fantastic and eco-friendly material to use as a base for your paper mache projects. Whether you’re crafting flat surfaces like trays or three-dimensional items like boxes, this method is both accessible and sustainable. You can easily turn old cardboard into something beautiful instead of tossing it away.
Begin by cutting your cardboard into the desired shapes and securing them with glue or tape to create a structure. Then, apply your paper mache mixture over the cardboard and let it dry. Lastly, unleash your creativity by painting or decorating your creation.
Steps to follow:
– Cut cardboard into your desired shapes
– Secure pieces together with glue or tape
– Apply paper mache mixture over the cardboard
– Let dry and finish with paint or decorations
This technique not only saves materials but also allows you to design practical items that are both beautiful and useful!
Using Cardboard as Base
Editor’s Choice


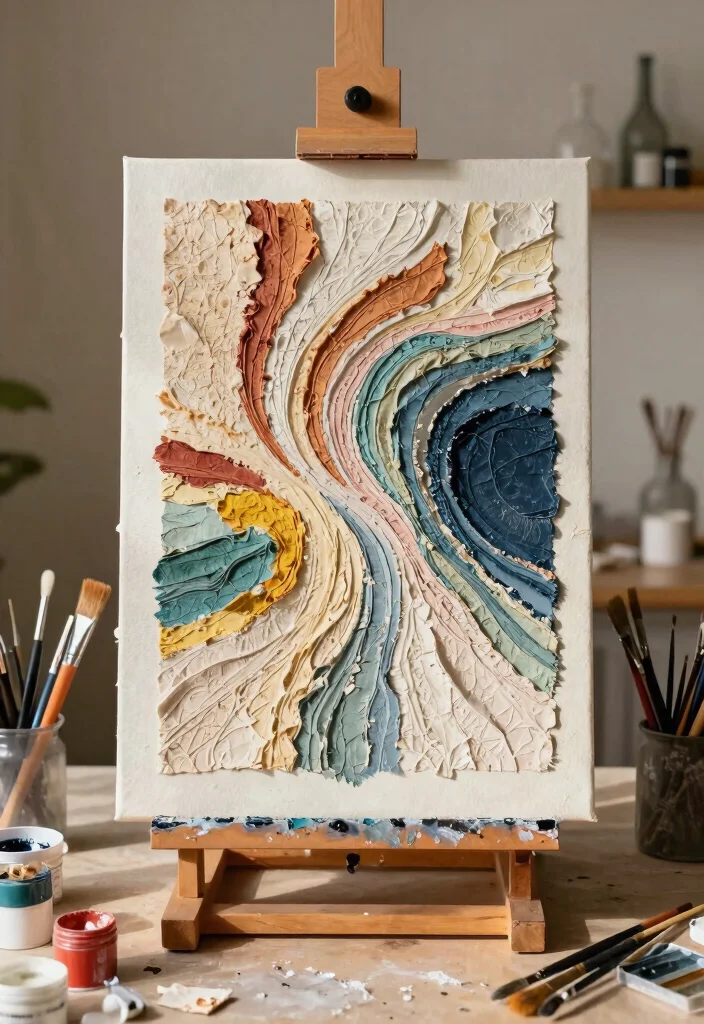
4. Layered Textures
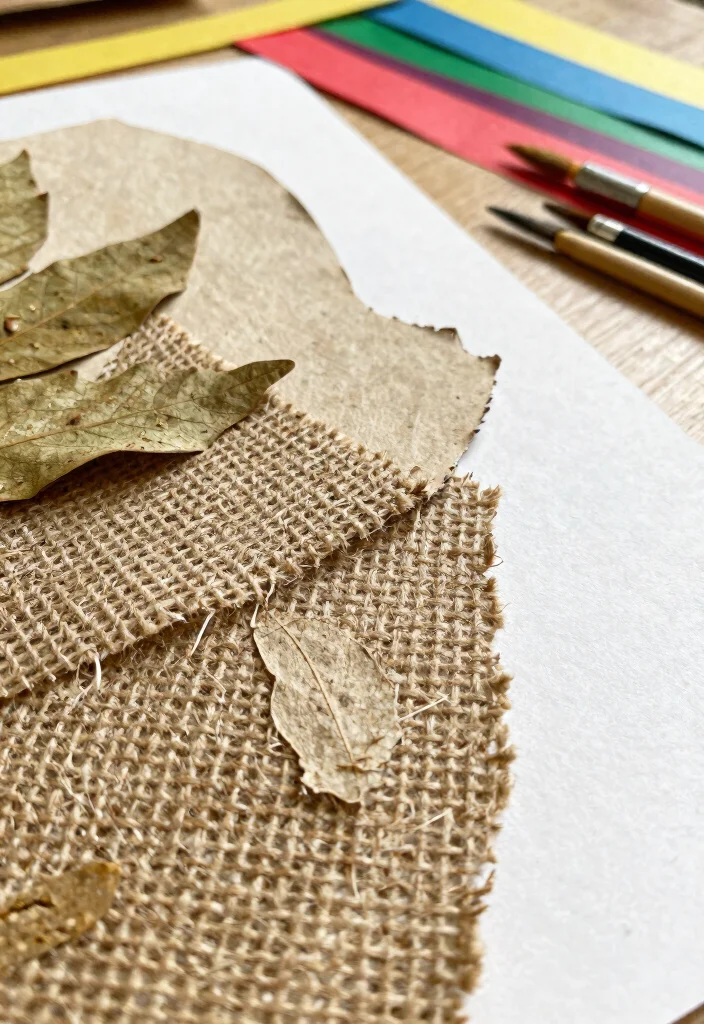
One exciting way to elevate your paper mache projects is by experimenting with layered textures. Incorporating various materials like burlap, lace, or even leaves can create stunning visual effects. This technique enhances your sculptures, making them more interesting and inviting to the eye.
Start with your base using the classic paper mache method, then introduce additional textures by layering different materials between your paper strips. Continue building layers until you achieve your desired thickness and effect, and finish off with a paint job to highlight the textures.
Here’s how to create textured designs:
– Prepare your base using classic paper mache
– Include additional materials between layers
– Build layers until you achieve desired thickness
– Finish with paint to enhance textures
This method is perfect for creating nature-inspired art pieces like flowers or trees that come alive with texture and detail!
📹 Related Video: Adding Paper Strips And Paste to Paper Mache
5. Colorful Paint Techniques
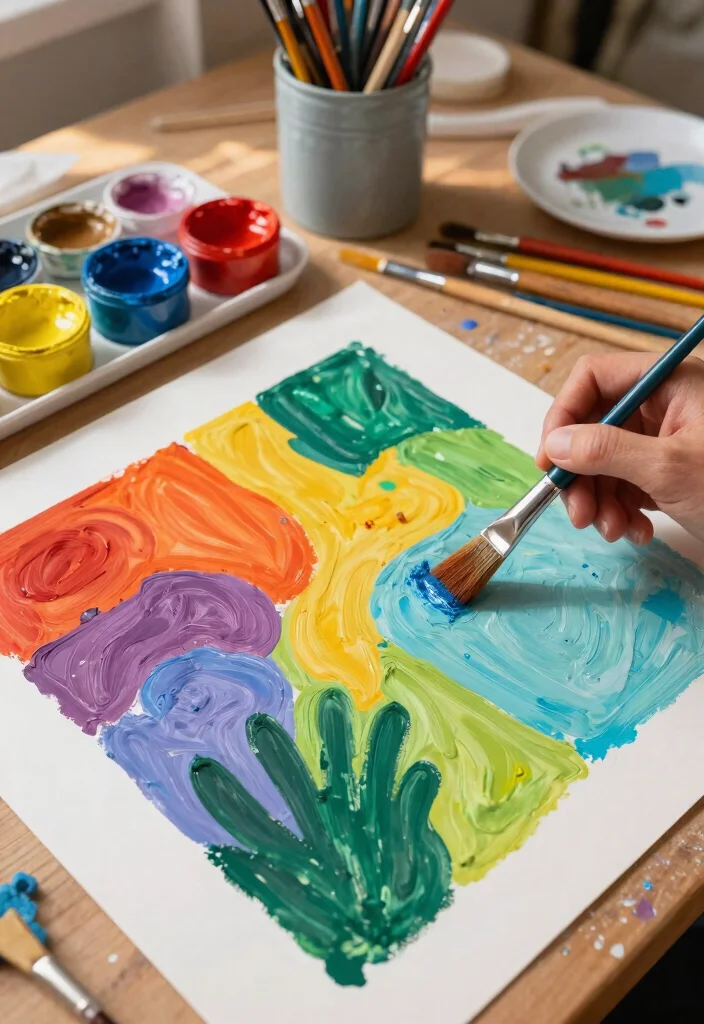
Once your paper mache project is dry, it’s time to infuse it with color! Painting can drastically transform your creations, allowing you to express your artistic flair. Whether you choose vibrant acrylics, delicate watercolors, or bold spray paints, the spectrum of options is limitless.
Prepare your dried paper mache by lightly sanding it to achieve a smoother finish. Pick your favorite paint types and colors, then experiment with various techniques—dry brushing for texture, sponging for depth, or layering colors for a unique look. Seal your masterpiece with a clear varnish for protection.
Steps to add color:
– Lightly sand your dried paper mache
– Select paint types and colors
– Experiment with different brush techniques
– Seal with clear varnish for durability
Create stunning ombre effects by blending colors, making your projects truly one-of-a-kind decor pieces that catch the eye!
How To Choose the Right Paper Mache Art Techniques
When it comes to starting a paper mache project, choosing the right technique can make all the difference. Here’s a guide to help you select the best paper mache art techniques for your next creative endeavor.
1. Purpose of Your Project
Decide what you want to create. Are you making décor, sculptures, or functional items? Understanding the purpose helps narrow down your options. For example, if you need a sturdy item like a bowl, consider methods that offer a strong structure, like the balloon or wire armature techniques.
2. Material Considerations
Think about the materials you have at hand. Typical supplies include newspaper, flour, water, and glue, but you can also use recycled materials. If you want vibrant colors, consider adding paint or using colored tissue paper. Make sure the materials you select align with your desired outcome.
3. Skill Level
Assess your skill level and experience with paper mache. If you’re a beginner, start with simpler techniques like the classic balloon method. If you’re more experienced, sculpting with wire armature allows for more complex designs. Choose a method that matches your comfort level for a more enjoyable experience.
4. Time and Effort
Consider how much time you can dedicate to the project. Some methods require multiple layers and drying time, while others might be quicker. Techniques like decoupage can be finished in a single day, while intricate masks or puppets may need several days to complete. Be realistic about your time commitment.
5. Size and Scale
Think about the size of the project you want to undertake. Larger projects may require more materials and time, while smaller items can often be completed quickly. If you want to create a large sculpture, using a sturdy base like cardboard can provide necessary support, while smaller projects can be formed from balloons or simple molds.
6. Eco-Friendly Options
If sustainability is important to you, look for eco-friendly techniques. Many projects can be made with recycled paper and natural adhesives, which help reduce waste. Discovering ways to incorporate upcycled materials not only makes your project unique but also supports environmental conservation.
Pro Tip: Before starting, sketch your idea and plan out your steps. This will help you figure out what techniques and materials you need. It’s always easier to adjust your plans on paper than during the messy crafting process! 🖌️
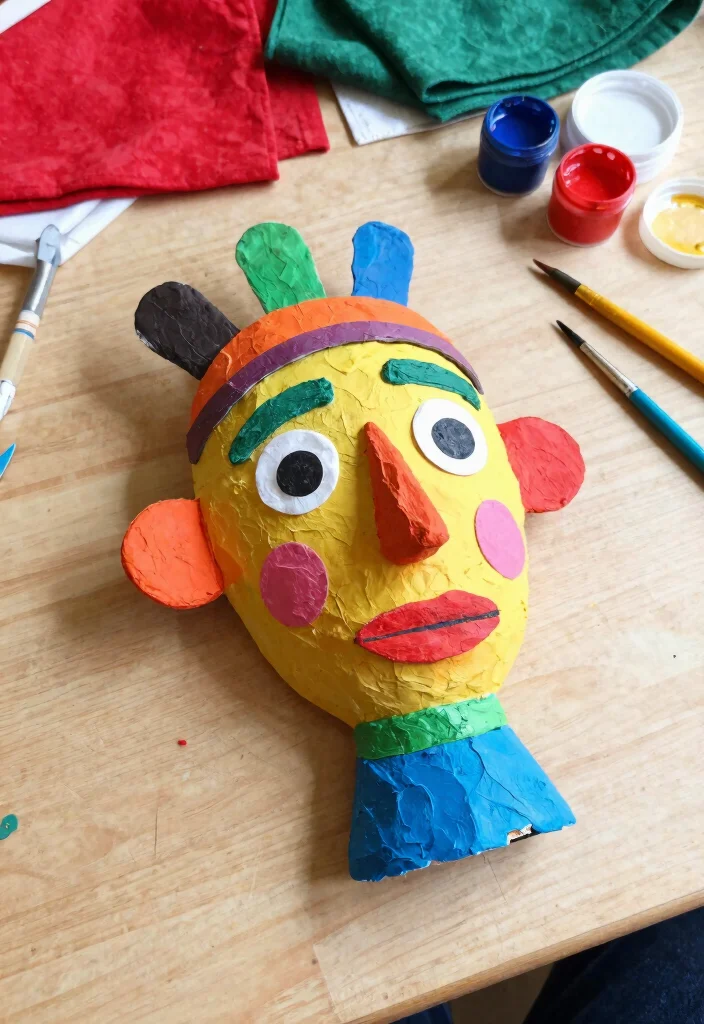
6. Paper Mache Masks
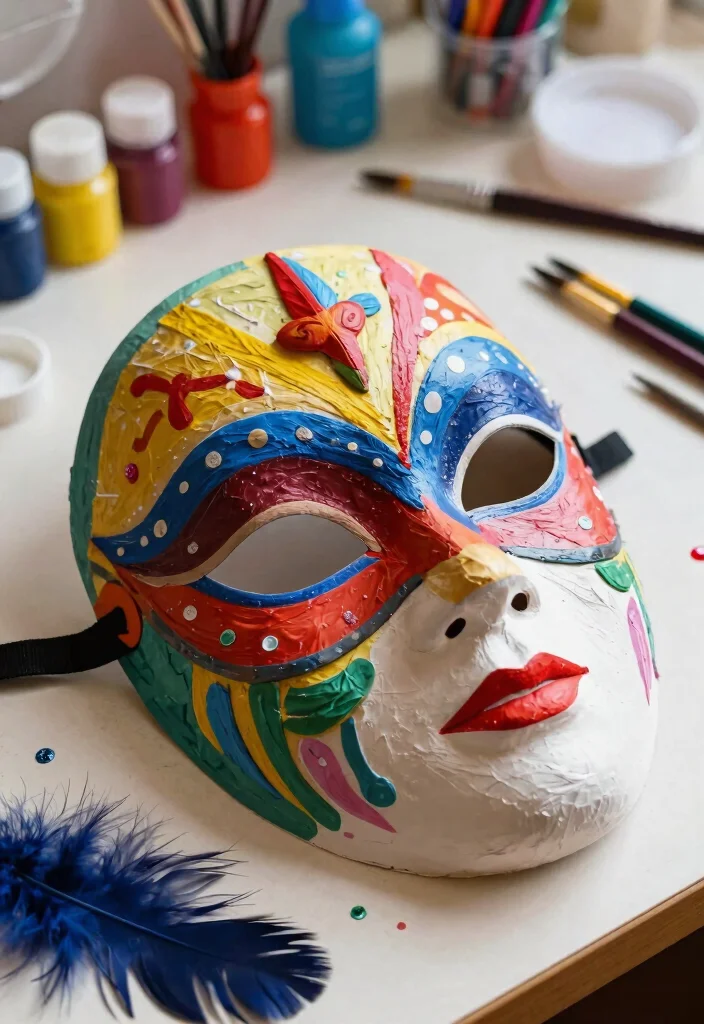
Crafting masks with paper mache is a delightful way to express your creativity! These masks are not only fun to make but also serve as fantastic decorations or costumes for various events. They can bring your favorite characters or themes to life in a unique way.
Start by creating or downloading a mask template. Use either the balloon or cardboard method to form the base of your mask. Layer on the paper mache and let it dry completely before decorating with paint, embellishments, or fabric.
Follow these steps to create your mask:
– Create or download a mask template
– Form the base using balloon or cardboard
– Apply paper mache layers and allow to dry
– Decorate with paint and embellishments
Incorporate feathers or beads for added flair. This project is a wonderful way to celebrate festivals or simply enjoy a creative evening at home!
Fun fact: a lightweight paper mache mask can sculpt vibrant faces with just two to three coats on a balloon base. Start with a mask template, choose balloon or cardboard method, and let it dry completely. Then paint and embellish for bold, character-worthy looks that celebrate paper mache art techniques.
7. Functional Paper Mache Items
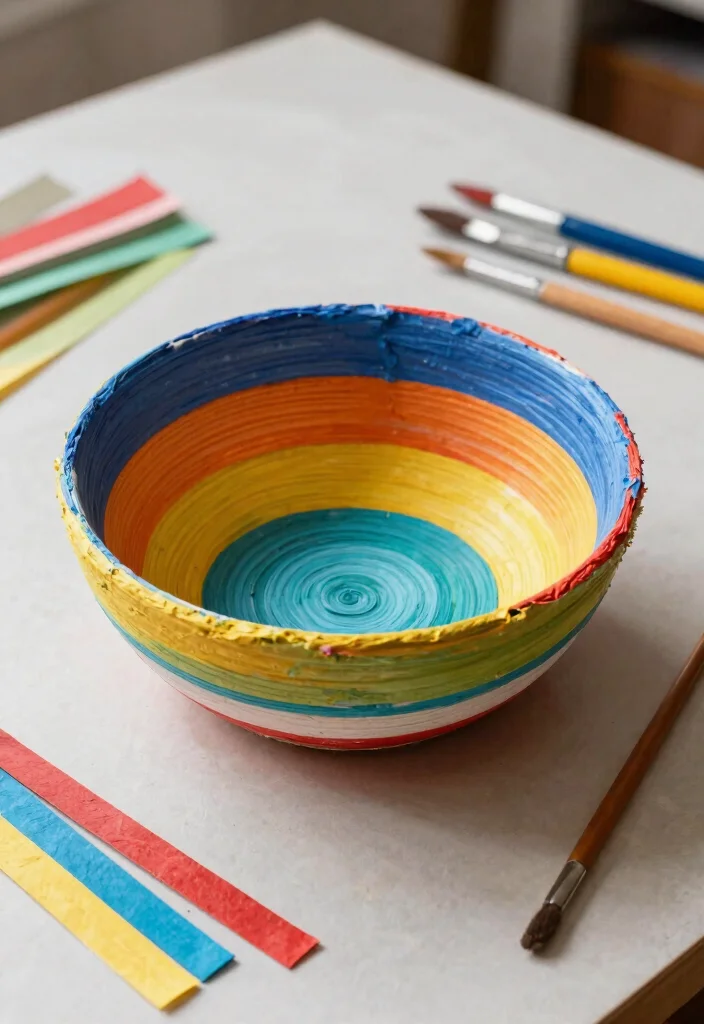
Why not look beyond art and dive into functional paper mache creations? From unique bowls to stylish planters, the potential for practical items is vast. These projects not only showcase your artistic talents but also serve a purpose in your daily life, merging beauty with utility.
Choose a functional item you’d like to make, such as a bowl or planter. Use appropriate molds, like balloons or bowls, to shape your creation. Layer the paper mache and let it dry thoroughly before finishing with a seal to ensure durability, especially for items that may come into contact with moisture.
Steps to create functional items:
– Select a functional item to create
– Use molds for shaping your piece
– Layer paper mache and let dry
– Finish with a seal for durability
Design charming pieces that match your home decor, adding a personal touch while indulging in a creative hobby!
8. Decoupage Paper Mache
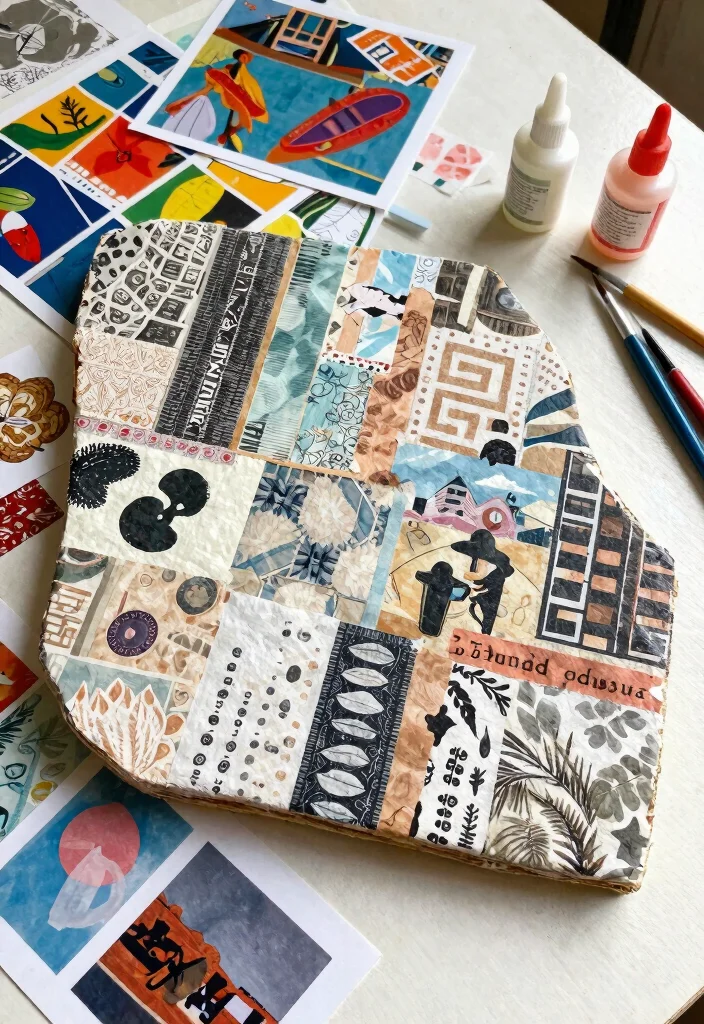
Decoupage is a playful way to merge techniques with paper mache. By using printed images or decorative paper, you can significantly enhance your projects. This method allows for unique customization, making your creations truly one-of-a-kind.
Start by preparing your paper mache surface, whether it’s a bowl or a sculpture. Select images or decorative paper to use, then apply a layer of decoupage glue on the surface and lay down your paper. Seal everything with additional glue for a polished finish.
Steps for decoupage:
– Prepare your paper mache surface
– Select images or decorative paper
– Apply decoupage glue and lay down paper
– Seal with additional glue for a finished look
Choose colors and images that resonate with your style for a stunning result. This approach is perfect for creating personalized decor items or unique gifts!
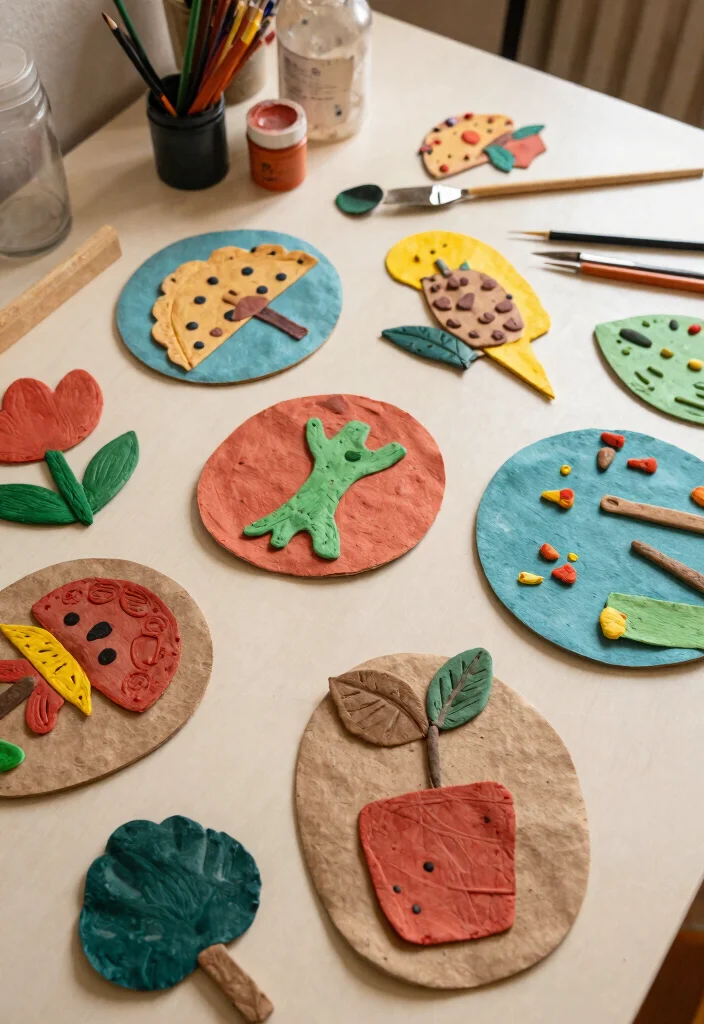
9. Nature-Inspired Paper Mache
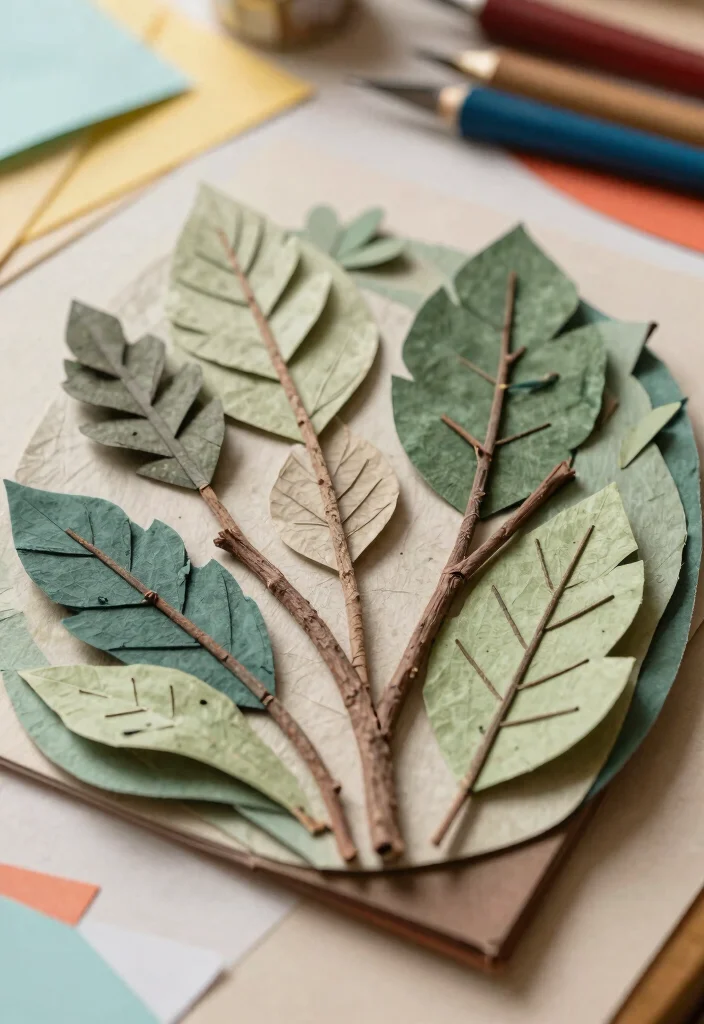
Let nature inspire your creativity by incorporating natural elements into your paper mache projects. Whether you’re crafting animals, plants, or landscapes, this method allows you to reflect the beauty of the outdoors in your art.
Choose a natural theme for your project, then use materials like leaves, flowers, or twigs along with your paper layers for added texture. Build and sculpt your item using traditional paper mache methods, and finish by painting to enhance the natural elements.
Steps to create nature-themed art:
– Choose a natural theme for your project
– Incorporate leaves, flowers, or twigs
– Build your item using classic paper mache
– Finish with paint to highlight natural features
Use real leaves or dried flowers for a realistic look. This method is excellent for creating seasonal decor or themed displays that celebrate the beauty of nature!
Nature-Inspired Paper Mache
Editor’s Choice


You might also like

10. Paper Mache Puppets
Creating puppets with paper mache can be a joyful project, especially for kids! These playful creations can be used for storytelling, performances, or simply as decorative items that spark imagination.
Start by shaping a basic puppet form using a balloon or a wire armature. Apply layers of paper mache and let them dry completely before painting and embellishing with fabric or other materials. Construct arms and features using additional paper mache for a complete puppet.
Here’s how to make your puppet:
– Create a basic puppet shape with a balloon or armature
– Apply paper mache layers and allow to dry
– Paint and embellish with fabric or materials
– Construct arms and features with more paper mache
This project is a fantastic way to engage children, encouraging them to learn the art of paper mache while adding a magical touch to their playtime!
Paper Mache Puppets
Editor’s Choice


11. Glowing Paper Mache Lanterns
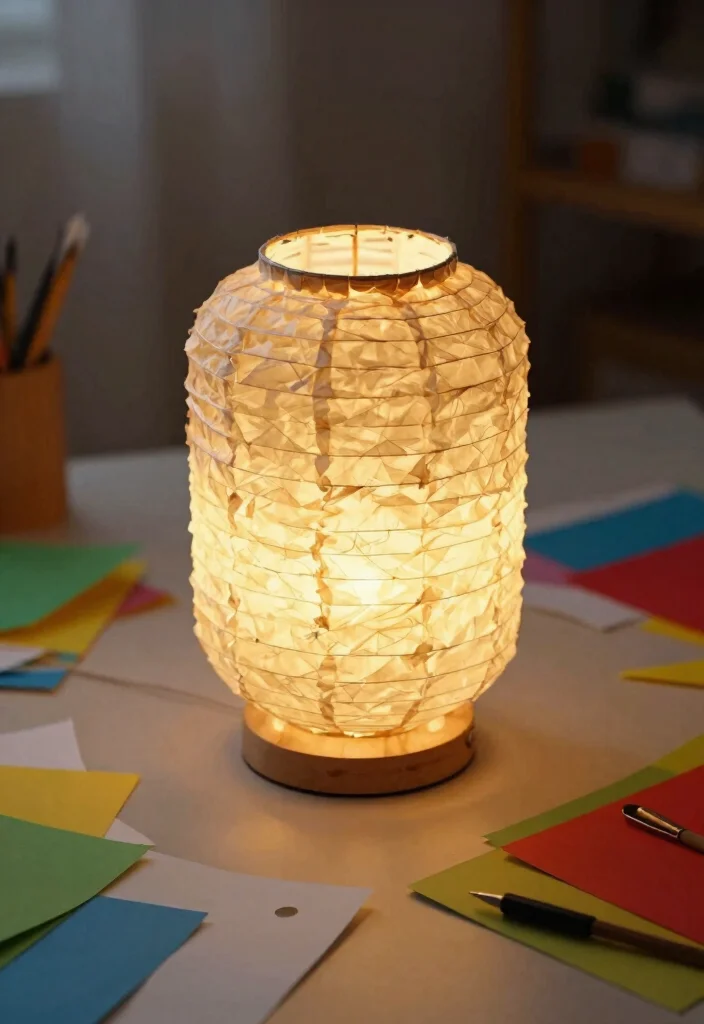
Brighten your space with glowing paper mache lanterns! This enchanting project adds a dreamy ambiance to any room or outdoor setting. The translucent quality of paper mache allows light to filter through beautifully, creating a warm glow.
Use a balloon as a base to shape your lantern. Apply layers of paper mache while leaving holes for light to shine through. Once dry, paint with translucent colors or keep the natural finish for a soft glow. Finally, place a candle or LED light inside to illuminate your creation.
Steps to make lanterns:
– Use a balloon to form the lantern shape
– Apply layers of paper mache, leaving holes
– Paint with translucent colors or leave natural
– Place a light source inside for illumination
Utilize colored tissue paper for a vibrant effect. These lanterns are perfect for parties, cozy evenings, or adding a whimsical touch to your decor!
Fun fact: With just a balloon base and a few thin layers of paper mache art techniques, you can create glowing lanterns. Let LED light filter through for a soft, warm glow.
12. Upcycled Projects
Take your creativity a step further by using upcycled materials in your paper mache creations. Transform old newspapers, junk mail, and scrap paper into beautiful art while promoting sustainability. This approach gives new life to items that might otherwise end up in the trash.
Gather the paper products you plan to use, then shred or tear them into strips. Utilize the classic paper mache method to create your project, finishing with paint or embellishments made from other upcycled materials.
Steps to upcycle effectively:
– Collect paper products you intend to use
– Shred or tear paper into strips
– Use classic paper mache methods for your project
– Finish with paint or embellishments from upcycled materials
This project not only encourages creativity but also supports eco-friendly practices. Your unique creations will have a story that adds character and charm!
13. Celebratory Paper Mache Decor
Celebrate special occasions by crafting paper mache decor! Whether it’s for parties or holiday ornaments, this technique allows you to unleash your creativity and make your celebrations memorable. Personalized decorations add a unique touch that guests will admire.
Select a theme for your decorations, and create shapes or structures that fit using the balloon or wire armature method. Layer the paper mache, allowing it to dry in between, then paint and decorate to align with your event’s color scheme.
Steps for celebratory decor:
– Choose a theme for your decorations
– Create shapes that fit your theme
– Layer paper mache, letting it dry in between
– Paint and decorate to match your event
Personalizing decorations for birthdays or holidays ensures a special touch. Your handmade creations will leave a lasting impression on your guests!
Did you know that a well-layered paper mache decor piece can hold its shape for weeks with just three thin coats? This is a practical trick in paper mache art techniques—perfect for celebrations where your balloons or wire armatures become stunning centerpieces.
14. Interactive Paper Mache Games
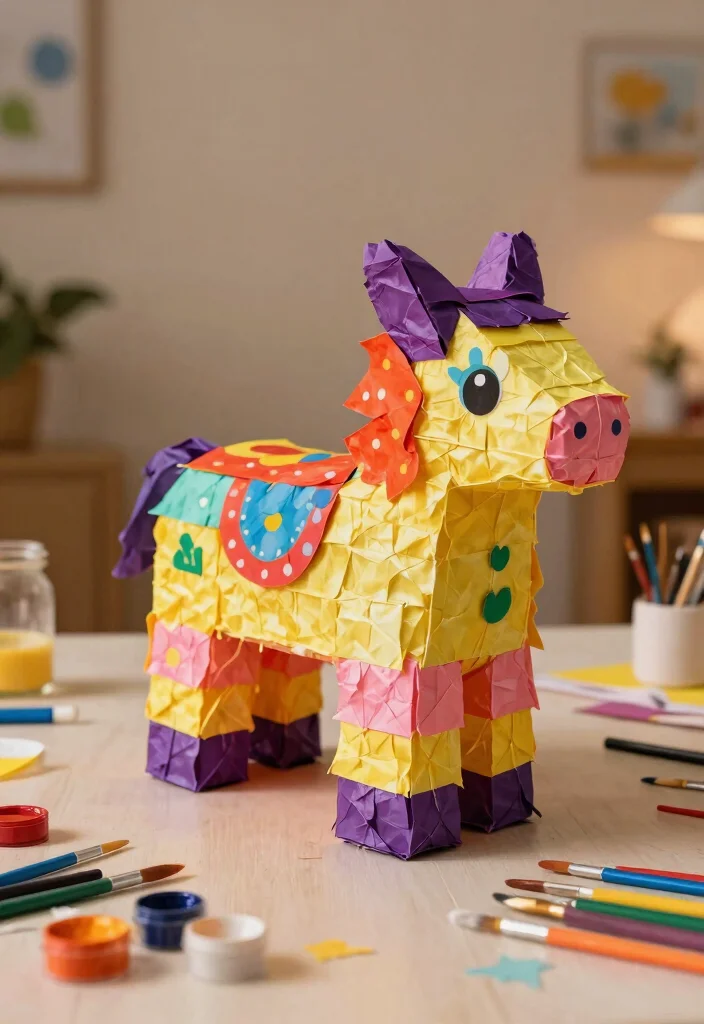
Unleash your creativity by making interactive games with paper mache! From pinatas to board game pieces, this method can lead to endless fun for family and friends. These projects not only showcase your artistic skills but also provide entertainment for gatherings.
Choose an inspiring game concept, then create the base using the balloon or cardboard method. Decorate and personalize your game pieces, ensuring they are durable for active use. Finish by preparing the game for everyone to enjoy.
Steps to create games:
– Choose a game concept that inspires you
– Create the base using balloon or cardboard
– Decorate your game pieces or pinata
– Ensure durability for active use
Create themed games for parties or gatherings; your guests will love the personal touch! This project combines art and entertainment, making it a hit at any event.
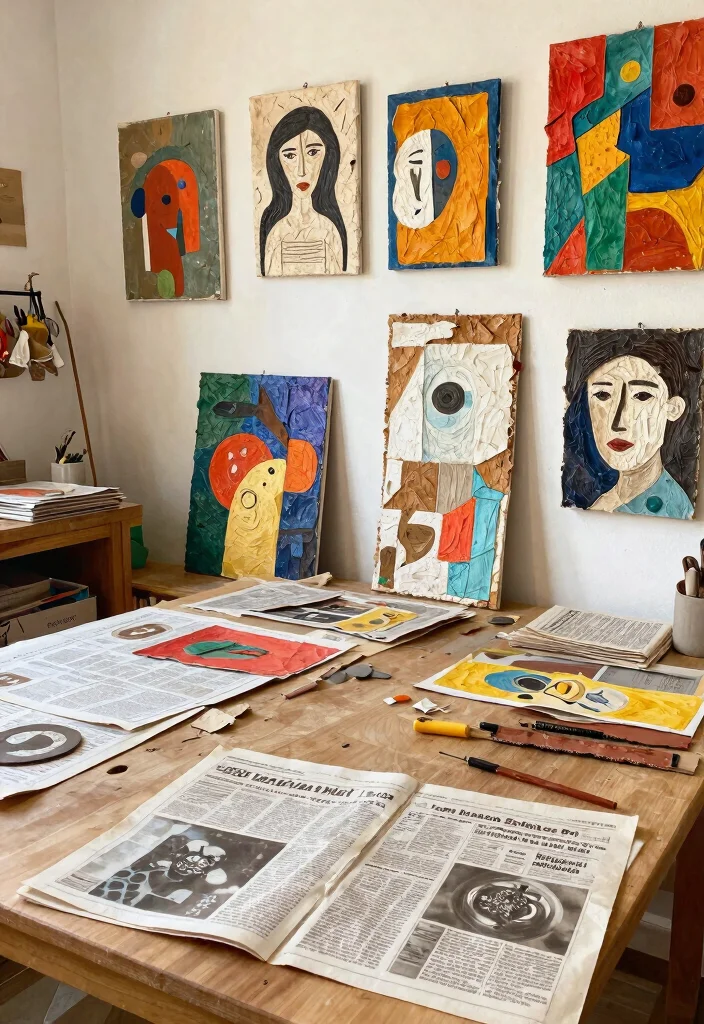
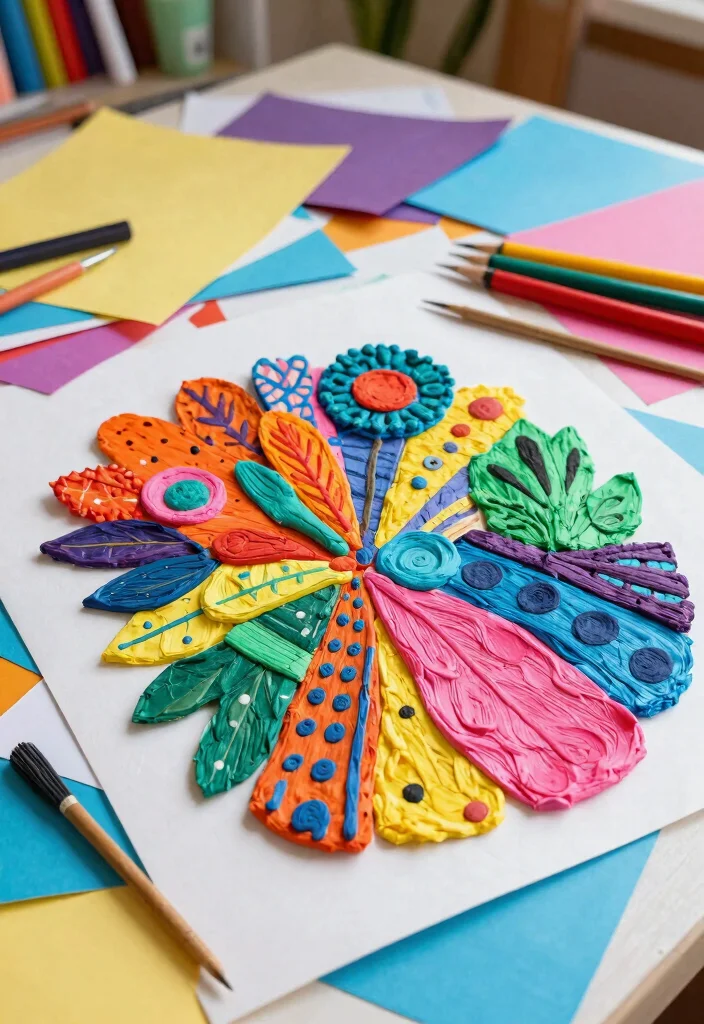
15. Textured Wall Art
Transform your walls with unique textured paper mache wall art! This method lets you create beautiful pieces that can serve as focal points in any room. With the right techniques, your wall art can become a stunning expression of your creativity.
Start by creating a base using a canvas or sturdy cardboard. Layer paper mache for texture, incorporating various materials for added depth. Once dry, paint and embellish your artwork to fit your personal style, then hang it proudly for display.
Steps to create wall art:
– Create a base using canvas or cardboard
– Layer paper mache for texture
– Paint and embellish to match your style
– Hang your artwork for display
Combine different techniques to achieve a stunning mixed-media effect. This project is ideal for adding a personal touch to your home decor!
Textured Wall Art
Editor’s Choice


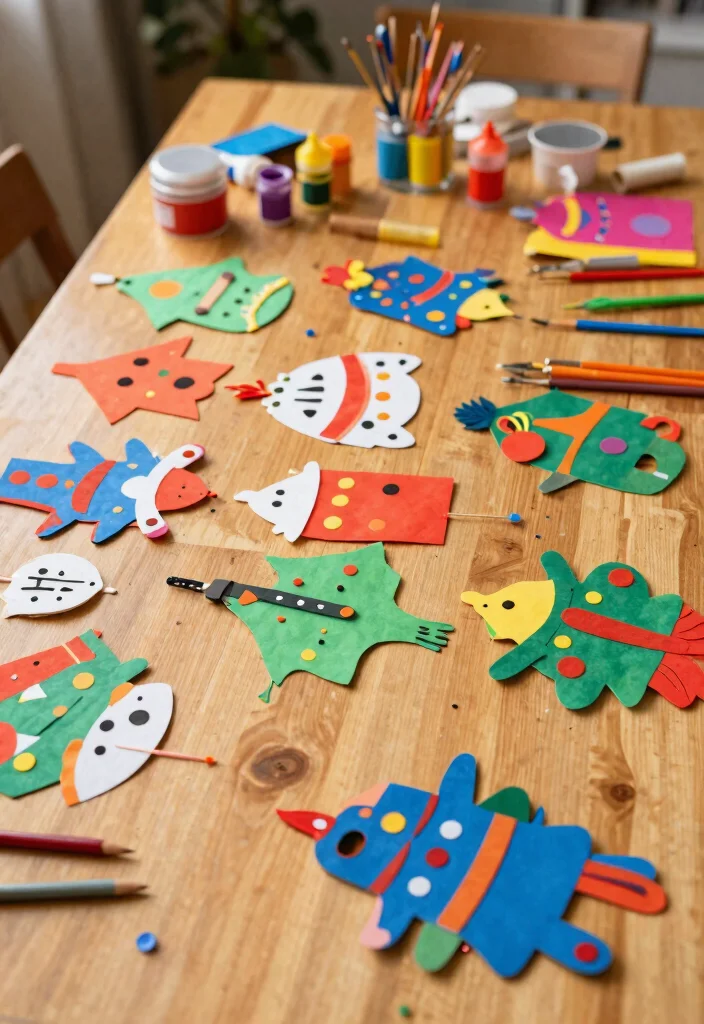
16. Seasonal Paper Mache Crafts
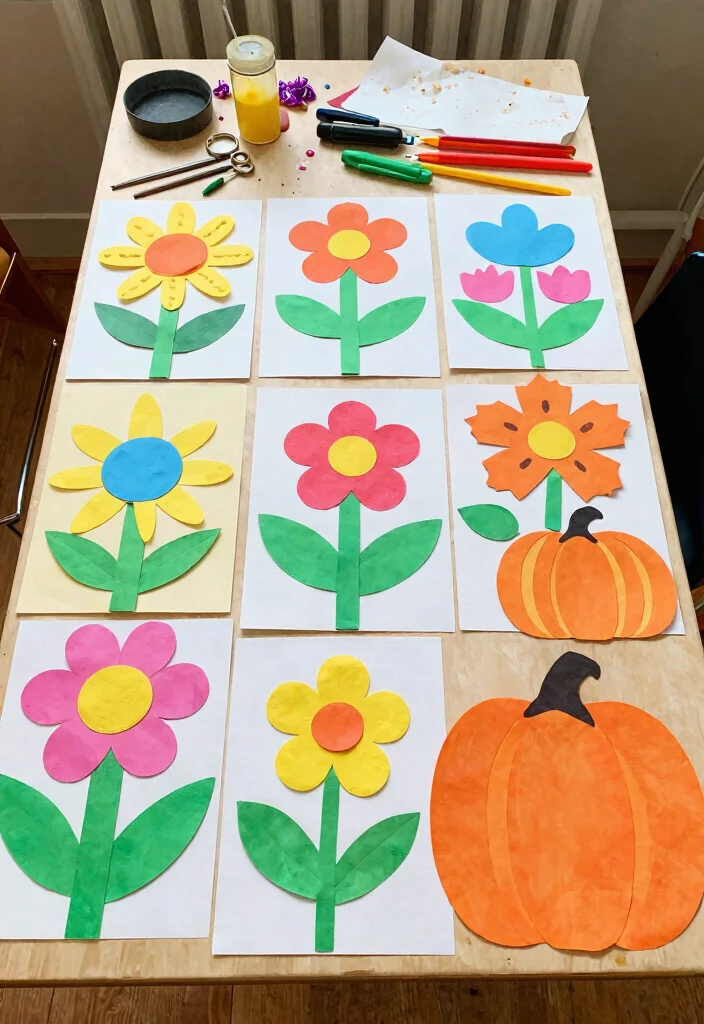
Celebrate the beauty of each season through paper mache crafts! You can create themed decor for spring, summer, fall, and winter, allowing your home to reflect the changing times beautifully. Engaging in seasonal projects keeps your decor fresh and inviting throughout the year.
Choose seasonal themes and icons, like pumpkins for fall or flowers for spring. Use the balloon or sculpture method to create your items, then decorate and paint according to seasonal colors. Display your crafts as part of your seasonal decor.
Steps for seasonal crafts:
– Choose seasonal themes and icons
– Use balloon or sculpture method to create items
– Decorate and paint according to the palette
– Display your crafts as seasonal decor
This approach invites family involvement in creating seasonal projects together, making memories while enhancing your home!
17. Collaborative Paper Mache Projects
Gather your family and friends for collaborative paper mache projects! Working together can lead to unique creations while fostering unforgettable memories. This group activity encourages creativity and teamwork, resulting in a beautiful joint piece of art.
Brainstorm project ideas as a group, then designate roles for everyone, such as sculptor or painter. Use a variety of techniques to blend your ideas into one cohesive design. Once completed, take a moment to reflect on your creation and celebrate your teamwork.
Steps for collaboration:
– Brainstorm project ideas as a group
– Designate roles for everyone involved
– Work together using various techniques
– Reflect on the creation and celebrate teamwork
This activity is a wonderful way to bond, fostering cooperation and the blending of diverse ideas into a beautiful artwork!
18. Eco-Friendly Paper Mache
Embrace sustainability with eco-friendly paper mache! Using recycled materials and non-toxic glues is a fantastic way to create beautiful art while caring for the planet. This method not only promotes creativity but also emphasizes the importance of environmental responsibility.
Source recycled paper or cardboard for your project, then create a paste using flour and water or a non-toxic glue. Follow traditional paper mache techniques to build your piece, finishing with eco-friendly paint or sealant to protect your creation.
Steps for eco-friendly projects:
– Source recycled materials for your project
– Create a paste using non-toxic glue
– Follow traditional methods to build your piece
– Finish with eco-friendly paint or sealant
Educate others about the benefits of eco-friendly practices through your art. This project reinforces the significance of sustainability in creativity while allowing you to express yourself!
19. Paper Mache Jewelry
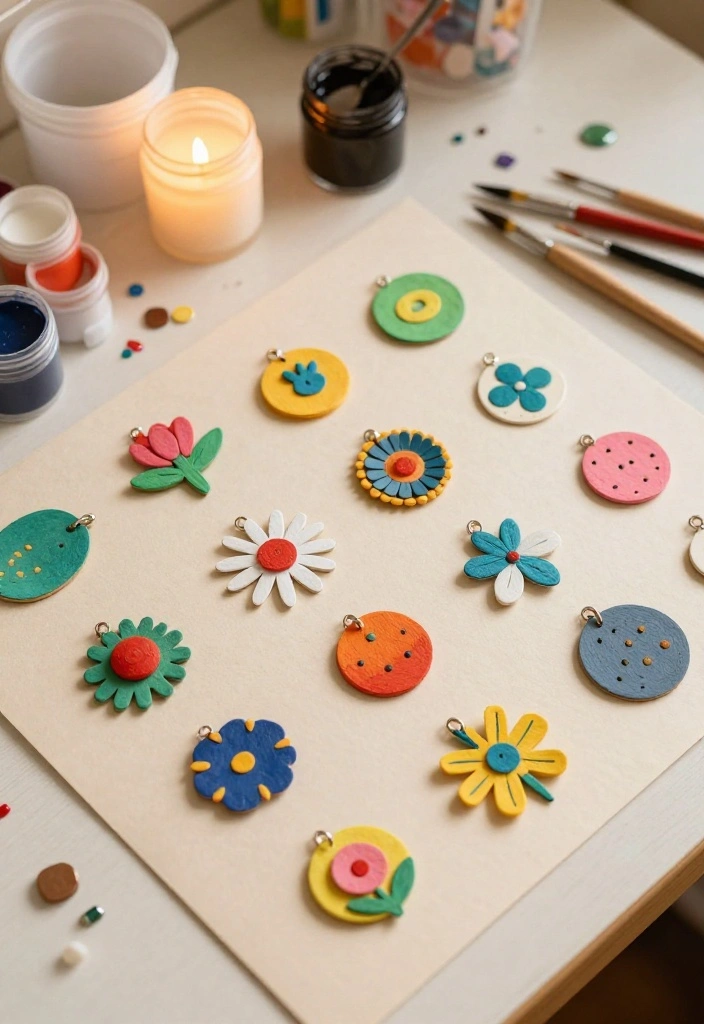
Create stunning paper mache jewelry for a unique fashion statement! This fun project combines art with wearability, allowing you to design personalized accessories that express your individual style. Making jewelry can be a delightful and rewarding experience.
Use small molds or shapes for your jewelry pieces, applying paper mache in thin layers and letting them dry. Once set, paint and add embellishments like beads or glitter to enhance your creations. Finally, attach findings to make earrings or necklaces.
Steps for creating jewelry:
– Use small molds or shapes for jewelry
– Apply thin layers of paper mache and let dry
– Paint and add embellishments
– Attach findings for earrings or necklaces
Explore different shapes and designs to curate a beautiful collection. This project is perfect for gifting or showcasing your personal style!
20. Experimental Techniques
Don’t shy away from experimentation! Incorporate unconventional materials or methods into your paper mache projects. This can include using fabric, foam, or even integrating sound elements, expanding your creative horizon.
Identify materials that intrigue you and consider how they can be integrated with traditional paper mache methods. Allow your creative instincts to guide you as you build your piece, then reflect on your work to inspire future projects.
Steps for experimentation:
– Identify unconventional materials to use
– Integrate them with traditional techniques
– Let your instincts guide your creative process
– Reflect on your work for future inspiration
Keep a journal of your experiments to track your progress. This journey of exploration may lead to surprising and delightful artistic outcomes!
21. Community Art Projects
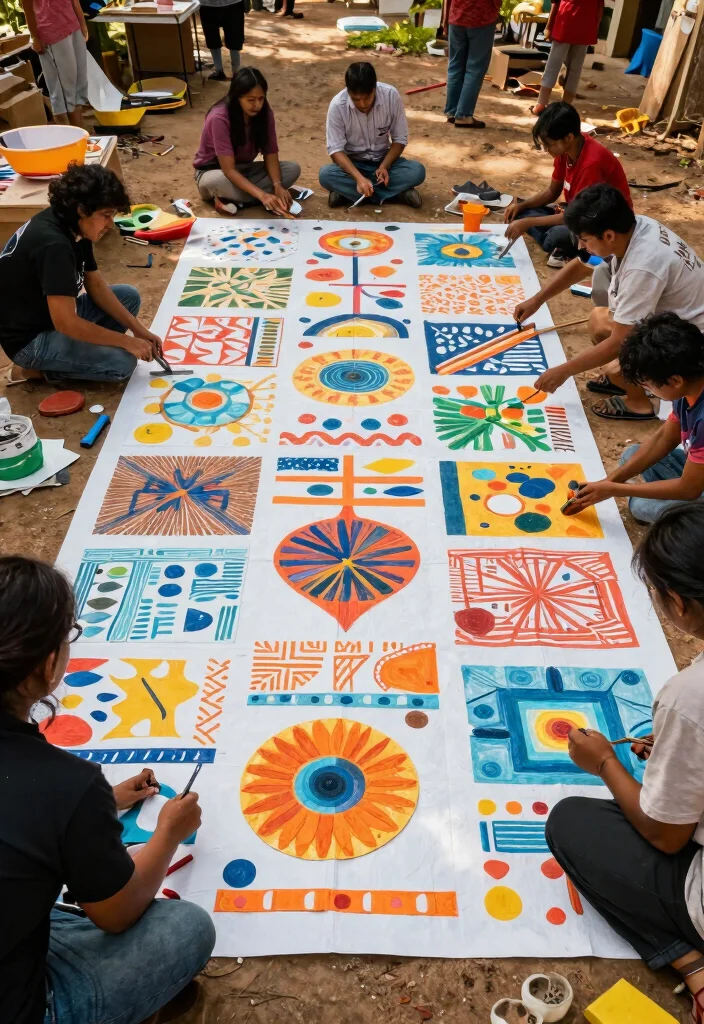
Engage with your community by creating large-scale paper mache art projects. These collaborative efforts not only beautify shared spaces but also bring people together in the creative process. Working as a team fosters a sense of unity and collective expression.
Collaborate with local artists or community members to design a piece, utilizing large molds or forms to create the base. Work together to apply paper mache layers and decorate, culminating in a piece that everyone can enjoy in a public area.
Steps for community projects:
– Collaborate with local artists or community members
– Utilize large molds to create the base
– Apply paper mache layers together
– Set up the final piece in a public area
Host community workshops to involve more people in the creative process. This project not only beautifies the community but fosters a shared sense of belonging through art!
Conclusion
Exploring the world of paper mache art techniques opens doors to endless possibilities. From whimsical sculptures to functional items, the only limit is your imagination!
Whether you’re crafting solo or collaborating with others, these techniques not only enhance your artistic skills but also infuse joy into your crafting experiences. So gather your materials and embark on a creative journey today, sharing your unique projects along the way!
Note: We aim to provide accurate product links, but some may occasionally expire or become unavailable. If this happens, please search directly on Amazon for the product or a suitable alternative.
This post contains Amazon affiliate links, meaning we may earn a small commission if you purchase through our links, at no extra cost to you.
Frequently Asked Questions
What are the best paper mache art techniques to start with for a beginner?
Great question. For beginners, start with the classic paper strip method using a simple flour-and-water paste on a balloon or cardboard armature. This gives you smooth shapes and is easy to master.
Try tissue paper collage to add color and texture, then experiment with a molded paper pulp approach for thicker, sturdy pieces. As you grow more confident, mix in plaster cloth or decoupage techniques for stronger surfaces and richer finishes.
Practical steps: 1) mix a smooth paste, 2) prepare your armature, 3) apply thin, even layers, 4) let dry completely, 5) sand lightly and paint. This selection covers several of the paper mache art techniques you’ll see in the 21 methods, and they’re great for building skills before tackling bigger projects.
How do I choose the right paper mache method for a project of a certain size or look?
Choosing the right method comes down to scale, finish, and how durable you want the piece to be. For small, lightweight details, a lightweight tissue-paper collage or paper-strip coat works well. For large, rounded forms, start with a balloon or cardboard armature and build up with paper strips or pulp. If you want a textured or rigid surface, try plaster cloth or a molded pulp approach. Quick decision steps: 1) define the size and weight, 2) decide on smooth vs. textured finish, 3) pick a base (balloon, cardboard, or armature), 4) apply 2–3 thin layers and let each dry, 5) finish with paint and sealant. The article’s collection of paper mache art techniques makes it easy to mix and match for any projects you’re dreaming up.
Which supplies are essential for most paper mache art techniques, and what extras are worth having?
Essentials you’ll reach for across many paper mache art techniques include: newspaper or thin paper, paper strips, a sturdy base (balloon or cardboard), a paste (flour-and-water or white glue mix), water for dilution, brushes, a mixing bowl, scissors, and masking tape.
For strength and clean shapes, add a cardboard armature or armature wire.
Extras that pay off: gesso or acrylic primer, acrylic paints for color, a clear sealant or varnish for protection, sandpaper for smoothing, and texture papers or stencils for unique effects.
If you’re aiming for a specific finish like a smooth sculpture or glossy surface, keep a small stash of inspiration textures handy. Having these basics will carry you through many projects from the article.
How can I find inspiration from the 21 methods and turn ideas into a finished paper mache project?
Start by skimming the 21 methods in the collection to spot textures, forms, and themes that catch your eye. Create a simple mood board or quick sketches to capture your idea. Pick one or two techniques to test in a small practice piece (maquette) so you can work out how to translate idea into form. Then scale up into a full project with a clear plan: select an armature, choose materials, and map the steps, drying times, and color plan. Finally, document the process so you can replicate or adapt later. This approach helps you transform inspiration into a completed paper mache art project you’re proud of.
How do I finish, seal, and preserve paper mache art to make it last, and what common issues should I watch for?
To finish, let the piece dry completely, then prime with a light coat of gesso or acrylic primer for a smooth base. Paint with acrylics, then seal with a clear varnish or sealant suitable for art projects. A couple of thin, even coats work best for durability. Watch for common issues: cracks from rapid drying—patch with a thin paste and re-dry slowly; warping from uneven moisture—press with weights while drying; mold in humid environments—dry thoroughly and store away from moisture; paint chipping—use a sealing layer and gentle handling. With proper drying, sealing, and storage, your paper mache art techniques can last for years and continue to inspire new projects.
Related Topics
paper mache art
craft techniques
DIY projects
creative inspiration
beginner friendly
advanced methods
eco-friendly crafts
seasonal decor
3D art
upcycled materials
family activities
fun crafts